If you have ever wondered how to build a beautiful charcuterie board without overthinking it, you are in the right place. This visual guide keeps things simple, balanced, and welcoming, so you can create a board that feels both polished and easy to enjoy.

Charcuterie Board Step by Step
Equipment
- 1 Large cutting board, serving tray, or platter
- 1 Small bowls for honey, jam, olives, or pickles (optional)
Ingredients
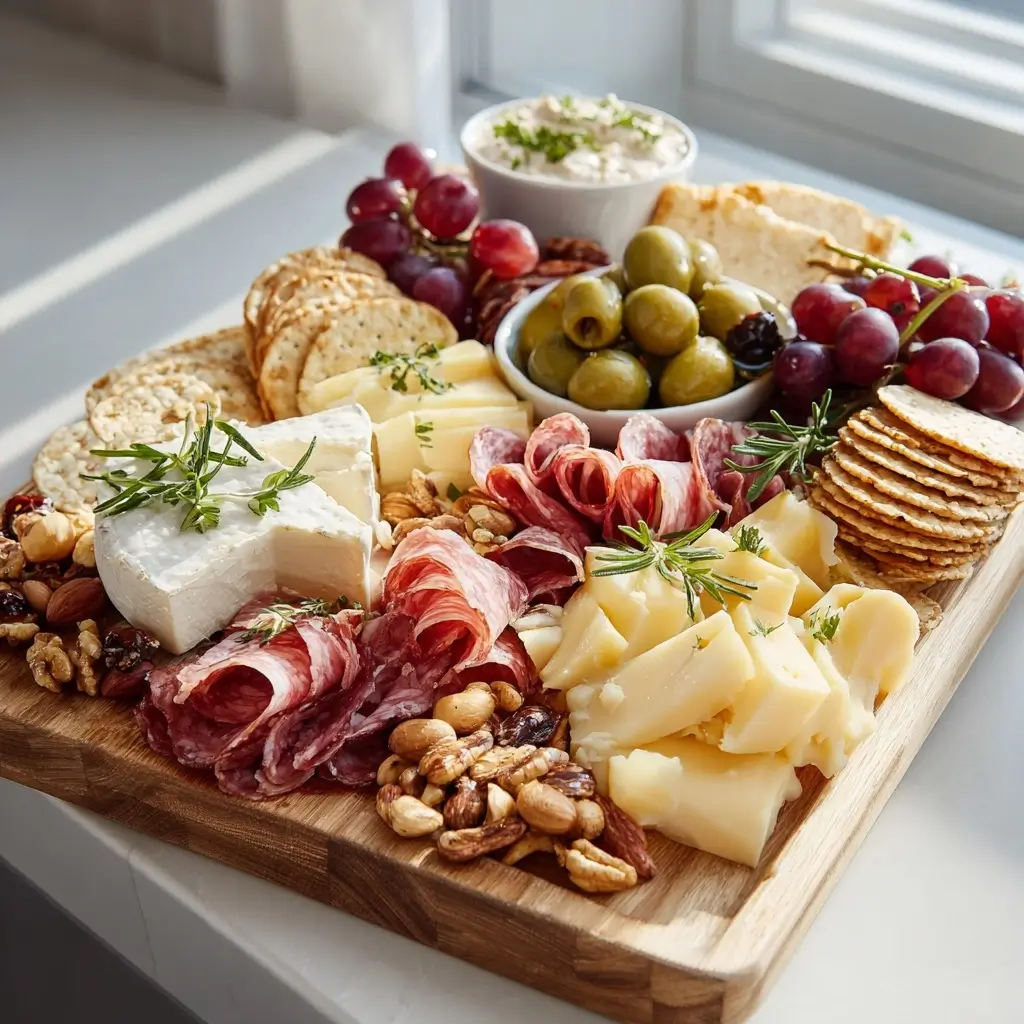
- 8 oz assorted sliced cheeses such as cheddar, gouda, and brie
- 8 oz turkey slices or beef salami
- 1 box crackers
- 1 baguette sliced baguette
- 2 cups fresh grapes
- 1 cup fresh berries such as strawberries or blueberries
- 1 cup olives
- 1 cup pickles
- 1 cup raw nuts such as almonds or cashews
- 0.25 cup honey or jam
- 1 bunch fresh herbs such as rosemary or thyme, for garnish
Instructions
- Start with a large cutting board, serving tray, or platter. Pick something with enough space so the ingredients can breathe and look intentional instead of crowded.
- Set down your cheeses first, because they create structure. Add small bowls for honey, jam, olives, or pickles to help define the board and keep wet ingredients in place.
- Arrange the turkey slices or beef salami near the cheeses. Fold or gently layer them for a fuller look, and tuck them into open spaces so the board starts to feel balanced.
- Fan crackers and bread slices around the cheeses and meats. Vary the direction of each cluster so the board looks relaxed and natural.
- Place grapes, berries, nuts, and pickles into the remaining spaces. These smaller ingredients help soften gaps and bring color to the board.
- Slip in fresh herbs for a polished look. A little rosemary or thyme goes a long way in making the whole board feel fresh and finished.
Notes
Why You’ll Love This Charcuterie Board Step by Step
This board is all about easy placement and natural flow. You do not need fancy tools or complicated ingredients, just a thoughtful mix of colors, textures, and shapes that come together beautifully.
It is also flexible, which makes it perfect for casual gatherings, family nights, or special occasions. You can scale it up or down, and every version still feels inviting.
Charcuterie Board Step by Step Ingredients & Substitutions
Use a mix of savory, creamy, crisp, and sweet items to create contrast on the board. Here is a simple ingredient list to help you get started.
- Assorted sliced cheeses, such as cheddar, gouda, and brie
- Turkey slices or beef salami
- Crackers and sliced baguette
- Fresh grapes
- Fresh berries, such as strawberries or blueberries
- Olives
- Pickles
- Raw nuts, such as almonds or cashews
- Honey or jam
- Fresh herbs, such as rosemary or thyme, for garnish
Substitution ideas: swap one cheese for another based on what you already have, use dried fruit instead of berries, or add cucumber slices and cherry tomatoes for extra freshness. If you want a little sweetness, try chocolate squares or dried apricots.
Step-by-Step Instructions to Make Charcuterie Board Step by Step
Step 1: Choose your board
Start with a large cutting board, serving tray, or platter. Pick something with enough space so the ingredients can breathe and look intentional instead of crowded.
Step 2: Place the anchor items
Set down your cheeses first, because they create structure. Add small bowls for honey, jam, olives, or pickles to help define the board and keep wet ingredients in place.
Step 3: Add the proteins
Arrange the turkey slices or beef salami near the cheeses. Fold or gently layer them for a fuller look, and tuck them into open spaces so the board starts to feel balanced.
Step 4: Fill in with crackers and bread
Fan crackers and bread slices around the cheeses and meats. Vary the direction of each cluster so the board looks relaxed and natural.
Step 5: Add fruit and crunchy items
Place grapes, berries, nuts, and pickles into the remaining spaces. These smaller ingredients help soften gaps and bring color to the board.
Step 6: Finish with garnishes
Slip in fresh herbs for a polished look. A little rosemary or thyme goes a long way in making the whole board feel fresh and finished.
Tips for Success
Keep the color palette varied, because a mix of light, dark, bright, and neutral tones makes the board more eye-catching. Also, place larger items first, then fill in with smaller pieces, so the layout feels guided and easy.
Do not worry about perfect symmetry. A charcuterie board often looks best when it feels abundant but still casual, with ingredients tucked together in a way that invites people to grab a bite.
Variations of Charcuterie Board Step by Step
You can build this board around a theme if you want to make it feel special. Try a breakfast version with fruit, cheese, bagels, and yogurt dip, or a dessert version with cookies, chocolate, strawberries, and marshmallows.
For a more savory board, add roasted vegetables, hummus, pita chips, and marinated artichokes. You can also make it seasonal with apples and cranberries in fall or peaches and cherries in summer.
Serving Suggestions: What to Pair with Charcuterie Board Step by Step
This board pairs nicely with sparkling water, fresh lemonade, iced tea, or fruit juice. If you are serving it as part of a meal, add a simple soup, salad, or sandwich platter to round things out.
It also works well as a starter before pasta, grilled chicken, or roasted vegetables. The beauty of the board is that it can stand on its own or share the table with almost anything.
Storage & Reheating Instructions
Store leftovers in separate airtight containers whenever possible. Crackers and bread should be kept apart from moist ingredients so they stay crisp.
Cheese, meats, fruit, and dips can be refrigerated for a couple of days, depending on freshness. This board is best served fresh, and it does not need reheating, but letting the cheese sit at room temperature for a short time before serving helps improve the texture.
Memories Made Around the Table
There is something special about a board that brings people together before the meal even begins. Everyone reaches in, talks, and tastes a little of everything, which makes the table feel warm and connected.
That is why I love building boards like this one. They turn simple ingredients into a shared moment, and those are often the memories that last longest.
FAQs
How do I make a charcuterie board look full?
Use a mix of large anchor items and smaller fillers. Place the biggest pieces first, then tuck grapes, nuts, herbs, and crackers into the open spaces.
What is the best cheese for a charcuterie board?
A mix of textures works best. Try one soft cheese, one firm cheese, and one bold cheese so guests have variety.
How far in advance can I make it?
You can prep many ingredients a few hours ahead, but build the board close to serving time for the freshest look and texture.
Can I make a charcuterie board without meat?
Yes, absolutely. Add extra cheese, fruit, nuts, olives, dips, and crackers for a satisfying meatless version.
Final Thoughts
A beautiful board does not have to be complicated. With a few thoughtful placements and a good mix of textures, you can create something that looks impressive and feels easy to share.
Once you try this simple approach, you may find yourself building charcuterie boards for every kind of gathering.