
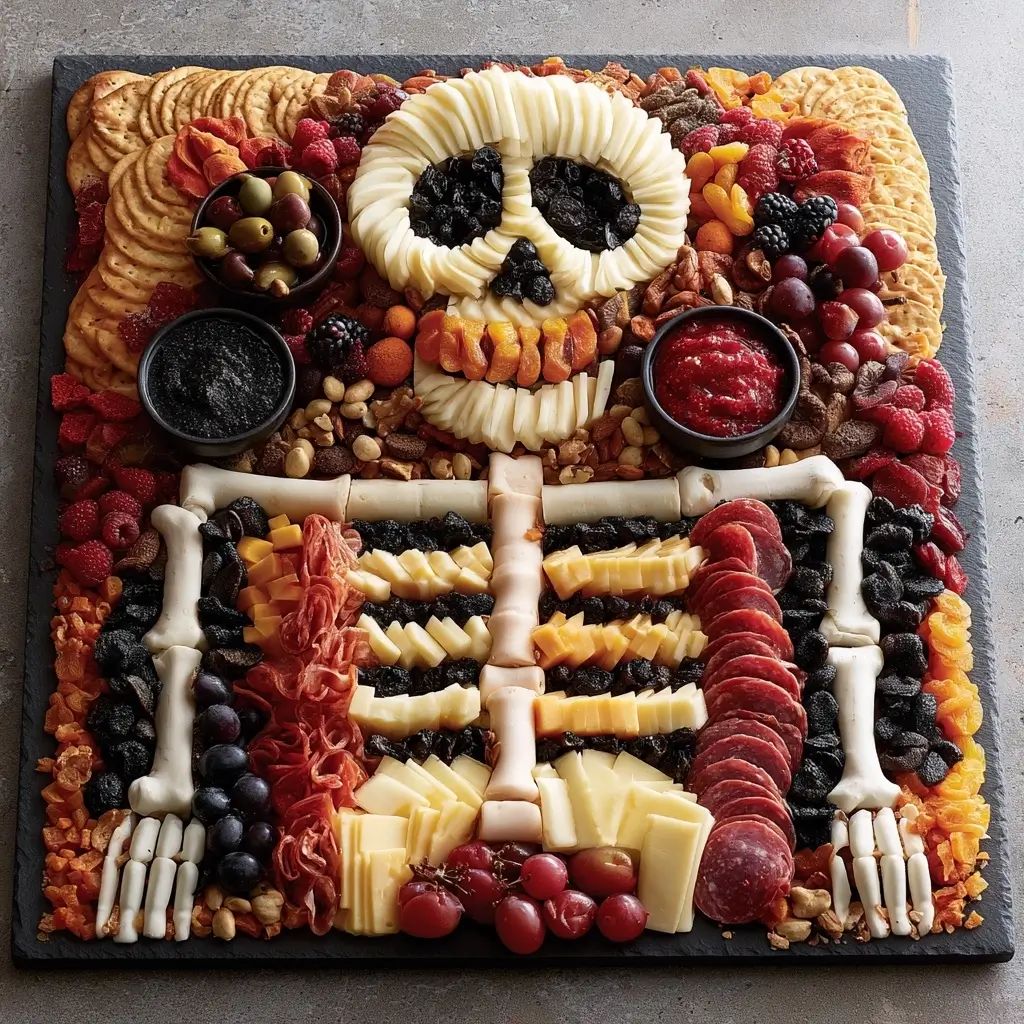
This Skeleton Charcuterie Board is such a fun Halloween party centerpiece, and it comes together with simple ingredients you can arrange in minutes. I love how easy it is to mix savory bites, crunchy extras, and a few sweet touches for a board that feels festive and inviting.
Skeleton Charcuterie Board
Equipment
- 1 Large platter or wooden board
- 1 Small bowl or cup for the skull area
- 1 Serving tongs optional
Ingredients
Skeleton Charcuterie Board Ingredients
- Assorted cheeses such as cheddar, mozzarella, gouda, and pepper jack
- Sliced turkey salami or beef salami
- Turkey pepperoni or thinly sliced roasted turkey
- Crackers breadsticks, or pretzel sticks
- Grapes apple slices, strawberries, or blackberries
- Olives or pickles
- Nuts such as almonds or cashews
- Hummus ranch dip, or a simple yogurt-based dip
- Fresh herbs such as rosemary or parsley
- Optional sweets like candy eyes or chocolate pieces
Instructions
- Start by placing a large platter or wooden board on your counter. Use a small bowl or cup for the skull area, then arrange cheeses, meats, and larger snacks to form the head, ribs, arms, and legs.
- Layer sliced cheese and meat around the outline, letting some pieces overlap naturally. Add crackers and breadsticks in the spaces to make the skeleton look full and balanced.
- Place grapes, olives, berries, and nuts in the open spots to create texture and color. Add a dip bowl near the body or the side of the board so guests can easily reach it.
- Tuck in fresh herbs for a little extra freshness, then add any optional candy eyes or Halloween accents. Step back and adjust any pieces so the skeleton shape feels clear and fun.
Notes
Why You’ll Love This Skeleton Charcuterie Board
This board is playful, eye-catching, and easy to customize for any crowd. It looks impressive on the table, but it is really just a matter of layering your favorite snacks in a skeleton shape.
You can make it as simple or as abundant as you like. It works well for party grazing, movie night, or a spooky Halloween gathering with friends and family.
Skeleton Charcuterie Board Ingredients & Substitutions
- Assorted cheeses, such as cheddar, mozzarella, gouda, and pepper jack
- Sliced turkey salami or beef salami
- Turkey pepperoni or thinly sliced roasted turkey
- Crackers, breadsticks, or pretzel sticks
- Grapes, apple slices, strawberries, or blackberries
- Olives or pickles for a salty bite
- Nuts, such as almonds or cashews
- Hummus, ranch dip, or a simple yogurt-based dip
- Fresh herbs, such as rosemary or parsley, for garnish
- Optional sweets, like candy eyes or chocolate pieces for extra Halloween fun
If you need swaps, choose any cheese you like best, use gluten-free crackers if needed, or swap the fresh fruit for dried fruit. You can also lean more savory with extra cheese and cured turkey slices, or go sweeter with more fruit and a few chocolate treats.
Step-by-Step Instructions to Make Skeleton Charcuterie Board
1. Build the skeleton shape
Start by placing a large platter or wooden board on your counter. Use a small bowl or cup for the skull area, then arrange cheeses, meats, and larger snacks to form the head, ribs, arms, and legs.
2. Fill in the body
Layer sliced cheese and meat around the outline, letting some pieces overlap naturally. Add crackers and breadsticks in the spaces to make the skeleton look full and balanced.
3. Add the details
Place grapes, olives, berries, and nuts in the open spots to create texture and color. Add a dip bowl near the body or the side of the board so guests can easily reach it.
4. Finish with garnish
Tuck in fresh herbs for a little extra freshness, then add any optional candy eyes or Halloween accents. Step back and adjust any pieces so the skeleton shape feels clear and fun.
Tips for Success
Use a mix of textures so every bite feels interesting, soft cheese, crisp crackers, juicy fruit, and salty bites all work beautifully together. If you want the skeleton shape to stand out more, keep the center line of the body a little lighter and place larger items around the outside.
For a cleaner presentation, chill your cheese and meat before assembling, then add delicate items like crackers and herbs right before serving. A big board helps, but you can also create the same idea on a baking sheet lined with parchment.
Variations of Skeleton Charcuterie Board
Try a kid-friendly version with extra fruit, mild cheese, pretzels, and a sweet dip. For a more savory board, add marinated vegetables, smoked cheeses, and plenty of crunchy crackers.
You can also make a dessert-style version with cookies, chocolate-dipped fruit, mini marshmallows, and candy pieces. If you want a more elegant look, use only monochrome ingredients like white cheeses, pale crackers, and dark grapes for a dramatic effect.
Serving Suggestions: What to Pair with Skeleton Charcuterie Board
This board pairs nicely with sparkling water, apple cider, lemonade, or a simple punch. It also works well alongside soups, sliders, or a big fall salad if you are serving it as part of a larger spread.
For a Halloween party, set it next to themed napkins, small plates, and toothpicks or mini tongs so guests can graze easily. A few candles or small pumpkins nearby make the table feel extra festive.
Storage & Reheating Instructions
Store leftovers by separating the ingredients into airtight containers. Keep cheese, meats, fruit, and crackers in different containers so everything stays fresh and the crackers do not soften.
There is no reheating needed. If the board has been sitting out for a while, remove any fresh ingredients that no longer look their best and rebuild a smaller board with the leftovers.
Memories Made Around the Table
There is something so cozy about gathering around a snack board while the costumes come out and the music gets a little spooky. This kind of centerpiece always gets people talking, and I love how everyone finds their own favorite bite.
FAQs
How far ahead can I make this board?
You can prep most of the ingredients a few hours ahead. For the best look and texture, assemble the board shortly before serving and add crackers at the end.
What board works best for the skeleton shape?
A large wooden board, serving tray, or baking sheet works well. Choose a surface with enough room to sketch out the skeleton shape without crowding the ingredients.
Can I make this without meat?
Yes, absolutely. Use extra cheese, fruit, nuts, olives, crackers, and dips to build the shape while keeping the board full and colorful.
How do I keep the skeleton shape looking clear?
Use the bowl or cup for the skull, then place the body pieces in a simple outline. Once the main shape is set, fill in the gaps with smaller snacks so the design still reads like a skeleton.
Final Thoughts
This Skeleton Charcuterie Board is a festive, low-stress way to bring Halloween charm to your table. With a few favorite snacks and a playful layout, you get a centerpiece that is just as fun to make as it is to serve.