
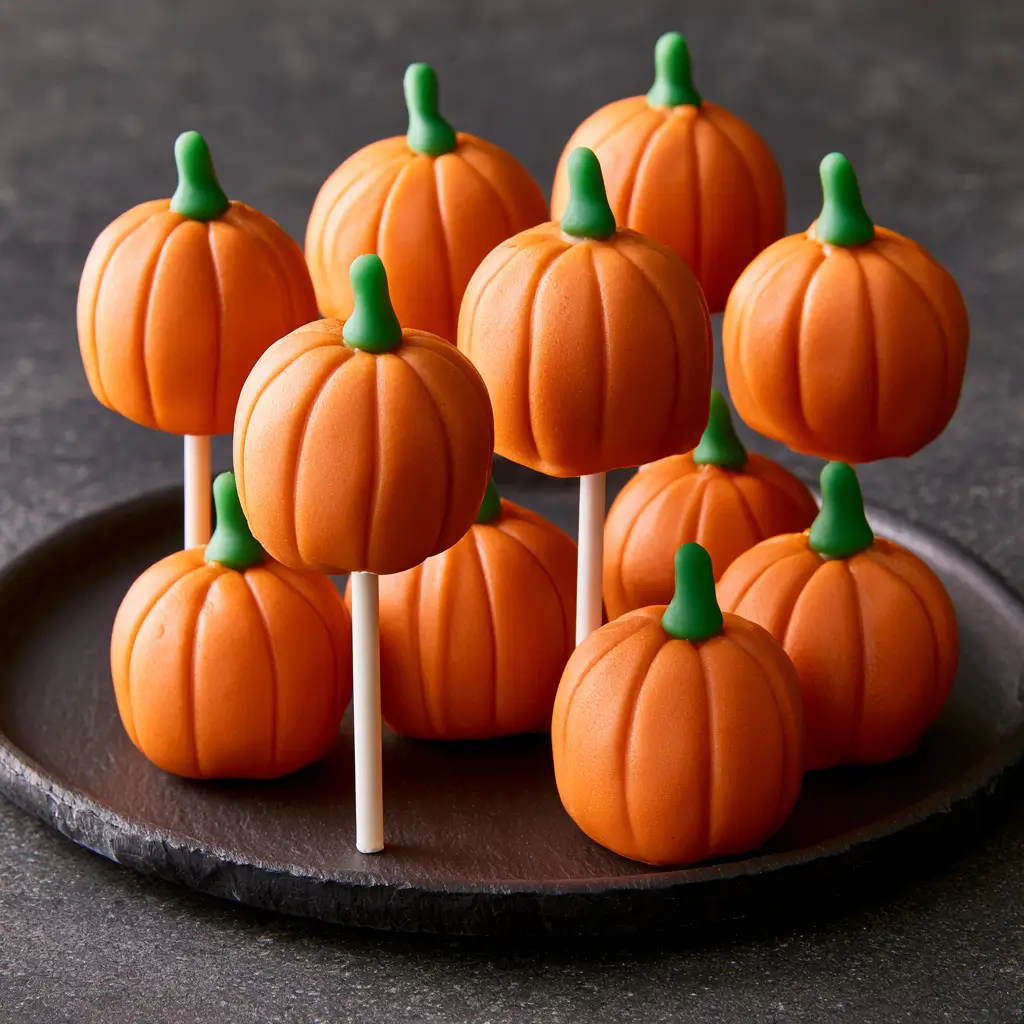
These Pumpkin Cake Pops are a fun little treat with cozy spice, soft cake, and a smooth coating that feels perfect for fall gatherings. They are easy to make ahead, share well, and always look adorable on a dessert table.
Pumpkin Cake Pops
Equipment
- 1 Large bowl
- 1 Lined baking sheet
Instructions
- Place the cooled pumpkin cake into a large bowl and break it into fine crumbs with your hands. Make sure there are no large chunks left behind.
- Add the frosting a little at a time and stir until the mixture holds together when pressed. You want it moist enough to roll, but not sticky or wet.
- Scoop and roll the mixture into smooth, even balls. Place them on a lined baking sheet and chill until firm.
- Dip the tip of each lollipop stick into the melted coating, then insert it halfway into each cake ball. Chill again so the sticks set in place.
- Dip each chilled pop into the melted coating, letting the excess drip off gently. If needed, tap lightly to smooth the finish.
- Add sprinkles right away, then stand the cake pops upright until the coating is fully set. Once firm, they are ready to serve.
Notes
Why You’ll Love This Pumpkin Cake Pops
There is something so joyful about turning cake into bite-sized pops. They are festive, portable, and a great way to use up leftover cake or create a special dessert from scratch.
You will also love how flexible they are. You can keep the filling simple, decorate them with sprinkles, and make them look as polished or playful as you like.
Pumpkin Cake Pops Ingredients & Substitutions
- 1 prepared pumpkin cake, cooled and crumbled
- 1/2 cup cream cheese frosting, or as needed
- 10 ounces white chocolate or candy coating, melted
- 24 lollipop sticks
- Orange sprinkles or sanding sugar, optional
- Pinch of cinnamon, optional for extra warmth
If you do not want to use cream cheese frosting, a simple buttercream works well too. If you need a smoother finish, candy coating is often easier to work with than regular chocolate.
For decorating, keep it simple with a drizzle, or add sprinkles before the coating sets. If you want a stronger pumpkin spice flavor, a small pinch of cinnamon or pumpkin spice can be mixed into the cake crumbs.
Step-by-Step Instructions to Make Pumpkin Cake Pops
1. Crumble the cake
Place the cooled pumpkin cake into a large bowl and break it into fine crumbs with your hands. Make sure there are no large chunks left behind.
2. Mix in the frosting
Add the frosting a little at a time and stir until the mixture holds together when pressed. You want it moist enough to roll, but not sticky or wet.
3. Shape the cake balls
Scoop and roll the mixture into smooth, even balls. Place them on a lined baking sheet and chill until firm.
4. Add the sticks
Dip the tip of each lollipop stick into the melted coating, then insert it halfway into each cake ball. Chill again so the sticks set in place.
5. Coat the cake pops
Dip each chilled pop into the melted coating, letting the excess drip off gently. If needed, tap lightly to smooth the finish.
6. Decorate and set
Add sprinkles right away, then stand the cake pops upright until the coating is fully set. Once firm, they are ready to serve.
Tips for Success
Keep the cake crumbs fine and even, since large pieces can make the mixture hard to roll. If the mixture feels too soft, chill it for a few minutes before shaping.
When dipping, work with cake balls that are well chilled. This helps them stay on the stick and makes the coating set more cleanly.
If the melted coating is too thick, warm it gently and stir until smooth. A thinner coating gives you a neater, more even finish.
Variations of Pumpkin Cake Pops
Try using dark chocolate coating for a richer flavor, or drizzle the pops with a second color for a pretty finish. You can also roll them in finely crushed cookies instead of sprinkles.
For a spiced version, add a touch more cinnamon or a little nutmeg to the cake crumbs. If you want a lighter look, leave them plain and let the glossy coating shine.
Serving Suggestions: What to Pair with Pumpkin Cake Pops
These cake pops pair nicely with hot coffee, chai, or a simple glass of milk. They also look beautiful next to other fall desserts on a party tray.
Serve them after a cozy dinner, pack them for a bake sale, or place them in a tall jar for an easy centerpiece that doubles as dessert.
Storage & Reheating Instructions
Store the finished cake pops in an airtight container in the refrigerator for up to 5 days. Place parchment between layers if needed to keep them from sticking.
For longer storage, freeze the uncoated cake balls or fully finished pops for up to 2 months. Thaw in the refrigerator before serving. These are best enjoyed cold or at cool room temperature, so reheating is not needed.
Memories Made Around the Table
Recipes like these always bring a little extra cheer to the table. There is something nostalgic about handing someone a dessert on a stick, especially when it is made with warm pumpkin flavor and a homemade touch.
FAQs
Can I make Pumpkin Cake Pops ahead of time?
Yes, you can make them a day or two in advance. In fact, chilling them ahead often makes them easier to coat and serve.
Why are my cake pops falling off the stick?
They may be too soft or too warm. Chill the cake balls well, and dip the stick in coating before inserting it into the ball so it helps hold everything together.
Can I use store-bought cake?
Absolutely. A store-bought pumpkin cake works well and can save time, especially if you are making these for a party or holiday event.
What is the best coating for cake pops?
White chocolate or candy coating usually works best because it melts smoothly and sets firmly. It also gives you a nice surface for decorating.
Final Thoughts
These Pumpkin Cake Pops are one of those sweet little treats that feel special without being fussy. Whether you make them for a celebration or just because, they bring a cozy, homemade touch to any occasion.