Putting together a beautiful charcuterie board does not have to feel intimidating. With a few smart choices and a little balance, you can create a party spread that looks thoughtful, tastes amazing, and feels easy to pull together.

Charcuterie Board for Beginners
Equipment
- 1 Wooden board, large platter, tray, or baking sheet
- 1 Small bowls for honey, jam, olives, or other loose ingredients
- 1 Knife for slicing cheeses and fruit
- 1 Spreaders or small serving utensils optional
Ingredients
Charcuterie Board Ingredients
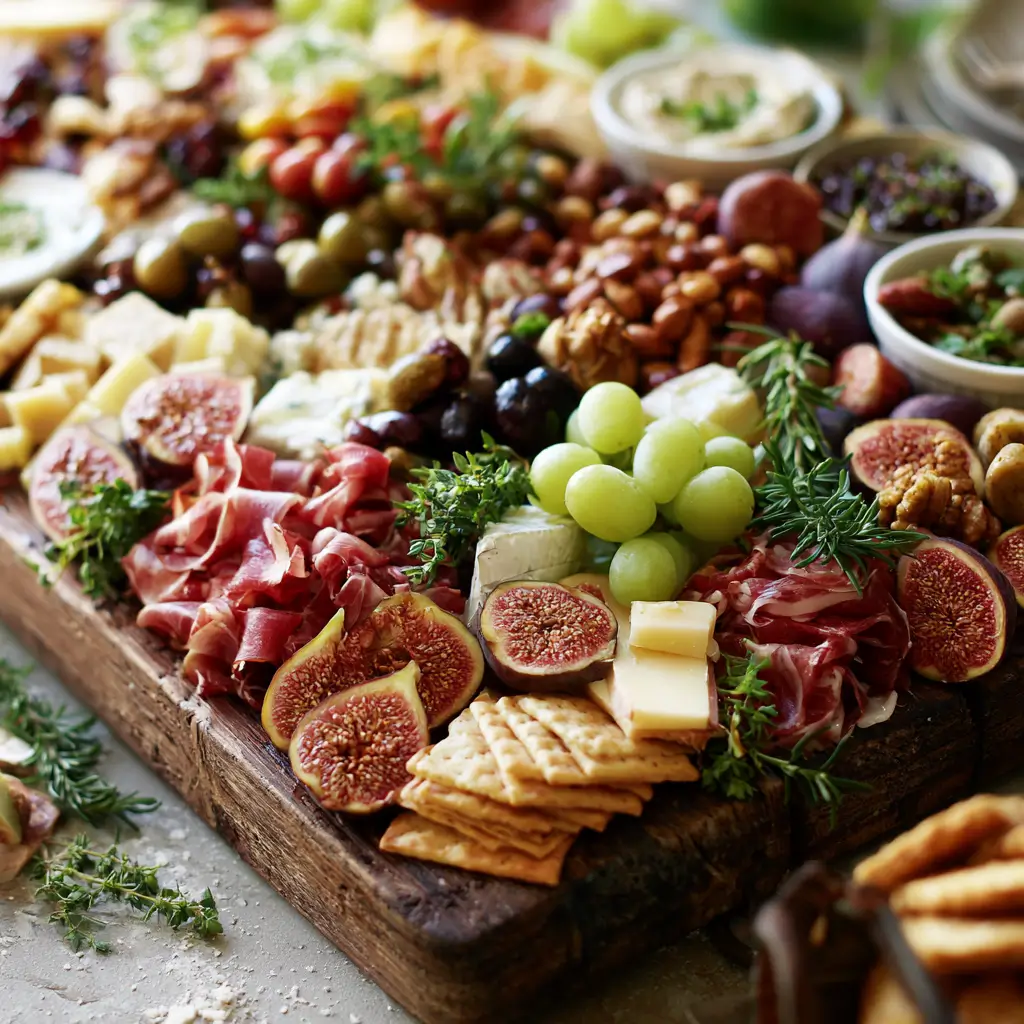
- Assorted cheeses such as cheddar, gouda, brie, or manchego
- Cured meats such as turkey salami, turkey pepperoni, or sliced roast turkey
- Fresh fruit such as grapes, berries, apple slices, or figs
- Dried fruit such as apricots, dates, or cranberries
- Crackers and bread such as water crackers, crostini, or sliced baguette
- Crunchy extras such as almonds, cashews, or roasted pepitas
- Something briny such as olives or pickles
- Something sweet such as honey, jam, or chocolate pieces
- Optional fresh herbs such as rosemary or thyme for garnish
Instructions
- Pick a wooden board, large platter, tray, or even a clean baking sheet. The bigger the gathering, the more surface area you will want.
- Set out the cheeses in different spots around the board. Add small bowls for honey, jam, olives, or other loose ingredients so the board stays organized.
- Fold or gently roll the turkey-based meats and tuck them near the cheeses. This creates shape and helps the board feel full without crowding it.
- Scatter fresh fruit, dried fruit, crackers, and nuts into the empty spaces. Try to mix colors and textures so each section feels balanced and lively.
- Add herbs, chocolate, or a few extra garnish pieces to make the board feel finished. Step back and look for empty spots, then fill them with a few more crackers or fruit.
Notes
Why You’ll Love This Charcuterie Board for Beginners
This board is all about simple ingredients, easy pairing, and a mix of colors and textures that make the whole table feel inviting. It is flexible, so you can build it around what you already have and what your guests enjoy.
You will also love how low-stress it is. Once you know the basic formula, you can put together a pretty, crowd-pleasing spread in no time.
Charcuterie Board for Beginners Ingredients & Substitutions
Start with a mix of savory, sweet, crunchy, and fresh items so every bite feels interesting.
- Assorted cheeses, such as cheddar, gouda, brie, or manchego
- Cured meats, such as turkey salami, turkey pepperoni, or sliced roast turkey
- Fresh fruit, such as grapes, berries, apple slices, or figs
- Dried fruit, such as apricots, dates, or cranberries
- Crackers and bread, such as water crackers, crostini, or sliced baguette
- Crunchy extras, such as almonds, cashews, or roasted pepitas
- Something briny, such as olives or pickles
- Something sweet, such as honey, jam, or chocolate pieces
- Optional fresh herbs, such as rosemary or thyme for garnish
If you cannot find one item, swap it with something similar in texture or flavor. For example, use extra fruit instead of dried fruit, or add more crackers if you want a lighter board.
Step-by-Step Instructions to Make Charcuterie Board for Beginners
Step 1: Choose your board
Pick a wooden board, large platter, tray, or even a clean baking sheet. The bigger the gathering, the more surface area you will want.
Step 2: Place the anchor items first
Set out the cheeses in different spots around the board. Add small bowls for honey, jam, olives, or other loose ingredients so the board stays organized.
Step 3: Add the meats
Fold or gently roll the turkey-based meats and tuck them near the cheeses. This creates shape and helps the board feel full without crowding it.
Step 4: Fill in with fruit and crunch
Scatter fresh fruit, dried fruit, crackers, and nuts into the empty spaces. Try to mix colors and textures so each section feels balanced and lively.
Step 5: Finish with the small details
Add herbs, chocolate, or a few extra garnish pieces to make the board feel finished. Step back and look for empty spots, then fill them with a few more crackers or fruit.
Tips for Success
Keep the cheeses at room temperature for about 20 to 30 minutes before serving so they taste their best. Slice a few items ahead of time, but leave some whole pieces on the board for a more natural look.
Think in groups of odd numbers, and repeat colors in different areas to make the board look intentional. Most of all, do not overthink it, a good board feels abundant, not perfect.
Variations of Charcuterie Board for Beginners
You can easily build a theme around the season or the occasion. Try a fruit-forward board with berries and stone fruit, a savory board with extra olives and pickles, or a cozy fall version with apples, cheddar, and spiced nuts.
For a more kid-friendly spread, use mild cheeses, crackers, grapes, turkey slices, and a small bowl of fruit spread. You can also make a dessert-style board with cookies, fruit, chocolate, and marshmallows.
Serving Suggestions: What to Pair with Charcuterie Board for Beginners
Serve this board with sparkling water, lemonade, iced tea, or a light fruit punch. It also pairs nicely with simple soups, salads, or a pasta dish if you want to turn it into a fuller meal.
For a party, place the board near napkins, small plates, and spreaders so guests can help themselves easily. A few bread baskets or extra crackers on the side are always helpful too.
Storage & Reheating Instructions
Store leftovers in airtight containers in the refrigerator, separating soft items from crackers when possible. Most cheeses and meats will keep well for a few days, while cut fruit is best enjoyed sooner.
This recipe does not need reheating. If anything has been chilled, let the cheeses and meats sit out briefly before serving again so the flavors come back to life.
Memories Made Around the Table
Some of my favorite gatherings are the ones where everyone lingers a little longer, chatting over small bites and refilling their plates as they go. A charcuterie board has a lovely way of making a simple evening feel special and relaxed.
FAQs
How do I make a charcuterie board look full?
Use a mix of small bowls, folded meats, sliced cheeses, and plenty of little fillers like grapes, nuts, and crackers. Filling the gaps is what gives the board that abundant look.
What cheeses are best for beginners?
Choose a soft cheese, a firm cheese, and one crowd-friendly option. Cheddar, gouda, brie, and manchego are all great places to start.
How far ahead can I assemble the board?
You can prep most ingredients a few hours ahead and assemble the board just before serving. If needed, cover and chill it briefly, then bring it out a little early so it is ready to enjoy.
What should I do if I do not have a large board?
Use a platter, tray, or even a large cutting board. You can also create two smaller boards and place them side by side for a pretty, flexible setup.
Final Thoughts
A beginner-friendly charcuterie board is less about perfection and more about balance, color, and variety. Once you get comfortable with the basic rules, you will find it easy to build a spread that feels festive, generous, and completely your own.