
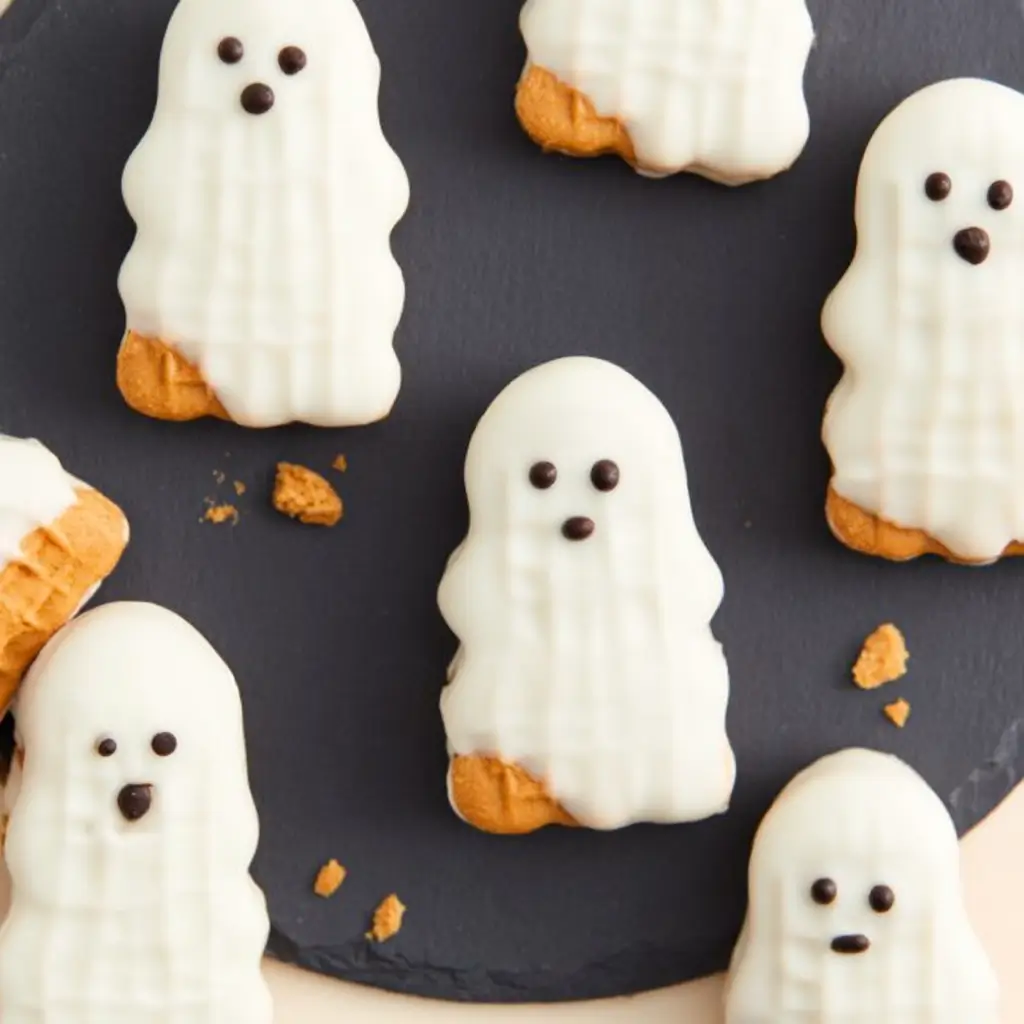
These Spooky Nutter Butter Ghost Cookies are such a fun little treat for Halloween parties, school events, or a cozy weekend baking project with the kids. They start with peanut butter sandwich cookies, then get dipped and decorated into cute ghost faces that are sweet, simple, and hard to resist.
Spooky Nutter Butter Ghost Cookies
Equipment
- 1 Baking Sheet lined with parchment paper
- 1 Parchment Paper
- 1 Heat-safe bowl
- 1 Fork
Ingredients
- 24 peanut butter sandwich cookies Nutter Butter style cookies work best
- 12 oz white candy melts or white chocolate for coating
- mini chocolate chips or black decorating icing for the eyes and mouth
- 1 tbsp coconut oil or vegetable shortening optional, to thin the coating
Instructions
- Line a baking sheet with parchment paper and set the cookies aside so they are ready for dipping.
- Melt the white candy melts or white chocolate in a heat-safe bowl until smooth. If needed, stir in a small spoonful of coconut oil to make the mixture easier to dip.
- Use a fork to lower each cookie into the melted coating, then lift and let the excess drip off. Place the coated cookie onto the prepared tray.
- While the coating is still soft, press on mini chocolate chips for eyes and a small mouth, or pipe the face on with black decorating icing.
- Allow the cookies to sit at room temperature until the coating is firm. For faster setting, place the tray in the refrigerator for a few minutes.
Notes
Why You’ll Love This Spooky Nutter Butter Ghost Cookies
They are festive without being fussy, and you do not need any special decorating skills to make them look adorable. The combination of creamy coating, peanut butter crunch, and playful chocolate faces makes them a crowd-pleaser for all ages.
Spooky Nutter Butter Ghost Cookies Ingredients & Substitutions
- Peanut butter sandwich cookies, Nutter Butter style cookies work best for the ghost shape
- White candy melts or white chocolate, for coating the cookies
- Mini chocolate chips or black decorating icing, for the eyes and mouth
- Coconut oil or vegetable shortening, optional, to help thin the coating
If you want a slightly different finish, use milk or dark chocolate for a mixed-cookie platter, but keep the white coating for the ghost look. If candy melts feel too sweet, you can use chopped white chocolate with a little coconut oil for a smoother dip.
Step-by-Step Instructions to Make Spooky Nutter Butter Ghost Cookies
Step 1: Prepare the cookies
Line a baking sheet with parchment paper and set the cookies aside so they are ready for dipping. This helps the decorating move quickly before the coating starts to set.
Step 2: Melt the coating
Melt the white candy melts or white chocolate in a heat-safe bowl until smooth. If needed, stir in a small spoonful of coconut oil to make the mixture easier to dip.
Step 3: Dip the cookies
Use a fork to lower each cookie into the melted coating, then lift and let the excess drip off. Place the coated cookie onto the prepared tray.
Step 4: Add the ghost faces
While the coating is still soft, press on mini chocolate chips for eyes and a small mouth, or pipe the face on with black decorating icing. Make each one a little different so they look extra charming.
Step 5: Let them set
Allow the cookies to sit at room temperature until the coating is firm. For faster setting, place the tray in the refrigerator for a few minutes.
Tips for Success
Keep the coating warm and smooth so the cookies dip easily. Work in small batches if your kitchen is warm, because candy melts can thicken as they cool. If you want cleaner faces, add the decorations before the coating hardens completely.
Variations of Spooky Nutter Butter Ghost Cookies
You can drizzle a little dark chocolate over the finished cookies for a spooky contrast. For a nut-free version, use a similar sandwich cookie that fits your needs and decorate it the same way. You can also add tiny sprinkles around the edges for a more playful party look.
Serving Suggestions: What to Pair with Spooky Nutter Butter Ghost Cookies
These cookies are lovely with a mug of hot cocoa, cold milk, or a simple fruit platter. They also make a cute addition to a dessert board with brownies, popcorn, and candy corn for a Halloween spread.
Storage & Reheating Instructions
Store the cookies in an airtight container at room temperature for up to 4 days. If your kitchen is warm, keep them in the refrigerator so the coating stays firm. There is no reheating needed, just let chilled cookies sit at room temperature for a few minutes before serving.
Memories Made Around the Table
I love recipes like this because they invite everyone to join in, from little hands placing chocolate chip eyes to adults sneaking a taste of the melted coating. It is the kind of simple kitchen project that turns an ordinary afternoon into a sweet seasonal memory.
FAQs
Can I make these ahead of time?
Yes, you can make them a day or two in advance. Store them in an airtight container until you are ready to serve.
What if I do not have candy melts?
White chocolate works well too. Just melt it gently and stir in a little coconut oil if you need a smoother texture.
How do I keep the decorations from sliding off?
Add the eyes and mouth while the coating is still soft. If it starts to set too fast, use a tiny dab of melted coating to help the decorations stick.
Can kids help make these cookies?
Absolutely. This is a great decorating recipe for kids, especially if an adult handles the melting and dipping.
Final Thoughts
Spooky Nutter Butter Ghost Cookies are proof that a festive treat can be easy, adorable, and delicious all at once. If you are looking for a fun Halloween dessert that brings smiles without a lot of effort, this is a sweet one to save and make again.