

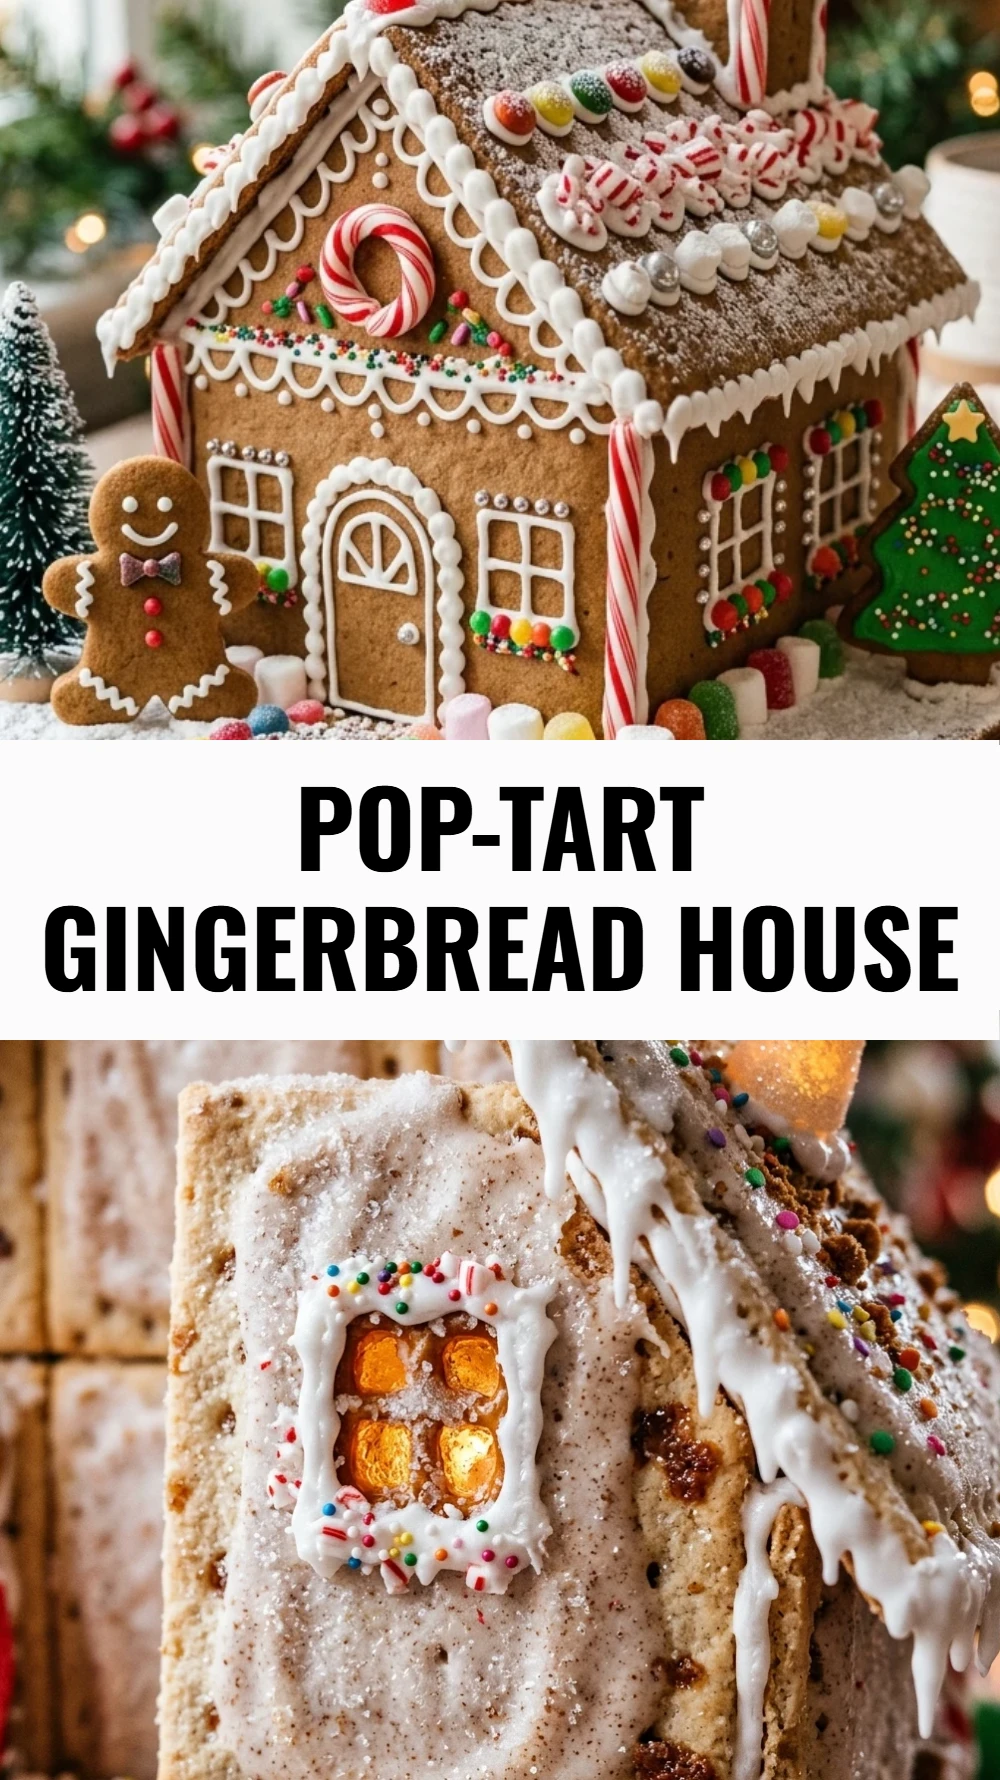
Building a gingerbread house is one of my favorite Christmas traditions, but I often find that baking the gingerbread from scratch takes more time than I have during the busy holiday season. I recently discovered that using toaster pastries is the perfect shortcut for creating a sturdy and adorable holiday home. This Pop-Tart Gingerbread House is a delightful project that allows me to focus on the fun part of decorating while skipping the oven entirely. It is a wonderful way to bring the family together for some creative holiday cheer without the stress of broken cookie walls.
Recipe Details
Recipe Information
- Prep Time: 30 minutes
- Cook Time: 0 minutes
- Total Time: 30 minutes
- Servings: 1 house
- Difficulty: Easy
Nutrition Information (Per Serving)
- Calories: 1850 kcal
- Protein: 12g
- Carbs: 340g
- Fat: 45g
Why You’ll Love This Pop-Tart Gingerbread House
This project is a total game changer for anyone who wants the Christmas aesthetic without the labor intensive baking. The pre-made pastries are perfectly rectangular, making them much easier to assemble than traditional gingerbread pieces that might spread or warp in the oven. Since the pastries are lightweight, they stay upright much better under the weight of heavy candy decorations. Plus, you can choose from various flavors like brown sugar cinnamon or strawberry to give your house a unique color and scent right from the start.
Pop-Tart Gingerbread House Ingredients & Substitutions
- 6 Frosted Brown Sugar Cinnamon Pop-Tarts (or your favorite flavor)
- 2 cups powdered sugar
- 2 tablespoons meringue powder
- 3 tablespoons warm water
- 1/2 teaspoon alcohol-free vanilla extract
- 1/2 cup small gumdrops
- 1/4 cup peppermint rounds
- 12 miniature candy canes
- 1 tablespoon festive sprinkles
- Edible glitter for a snowy effect
If you do not have meringue powder, you can use a thick mixture of powdered sugar and a small amount of milk or water, though it will take longer to dry. For the base, any frosted toaster pastry works well, and you can swap the candies for pretzel sticks, cereal, or dried fruit depending on what you have in your pantry. Using different flavors of pastries allows you to change the color of the house walls naturally without using extra food coloring.
Step-by-Step Instructions to Make Pop-Tart Gingerbread House
Step 1: Prepare the Pastry Pieces
Lay out four of your toaster pastries on a clean workspace. Use a sharp serrated knife to gently saw two of the pastries into a house shape by cutting off the top corners to create a pointed gable. Keep the other two pastries whole for the side walls. Use two additional pastries for the roof panels, which can be left as full rectangles or trimmed slightly if you prefer a shorter roofline.
Step 2: Mix the Royal Icing
In a medium bowl, whisk together the powdered sugar and meringue powder. Add the warm water and alcohol-free vanilla extract. Use an electric mixer to beat the mixture on high speed for about 5 to 7 minutes until it forms stiff, glossy peaks. This icing acts as the glue for your house, so it needs to be thick enough to hold the weight of the pastries and candy.
Step 3: Build the House Structure
Transfer the royal icing into a piping bag or a plastic storage bag with the corner snipped off. Pipe a thick line of icing onto a sturdy base, such as a cardboard cake board or a large flat plate. Stand the back gable piece and one side wall piece on the icing lines, then pipe a vertical line of icing where the two pieces meet. Hold them in place for a minute until the icing begins to set, then repeat with the front gable and the other side wall.
Step 4: Attach the Roof
Once the four walls are standing and the icing has hardened for about 10 minutes, pipe a generous amount of icing along the top edges of the wall structure. Carefully place the two remaining whole pastries onto the top to form the roof. Hold the roof pieces in place for a couple of minutes to ensure they do not slide down. It helps to pipe a line of icing along the very top ridge where the two roof pieces meet for extra stability.
Step 5: Decorate with Holiday Candy
Now comes the most creative part of the process. Use the remaining royal icing to “glue” gumdrops along the roofline and peppermint rounds around the base of the house. You can create a walkway using sprinkles or small candies. Use the miniature candy canes to frame the front door or create a decorative fence around the yard. Don’t forget to pipe some icicles hanging from the roof for a wintery touch.
Step 6: Let the House Set
Allow the entire structure to dry completely in a cool, dry place for at least two hours before moving it. This ensures that all the candy is secure and the “glue” has fully hardened. Once set, you can dust the entire scene with edible glitter or a light sifting of powdered sugar to mimic a fresh snowfall.
Tips for Success
When cutting your pastries, use a very gentle sawing motion with a serrated knife to prevent the crust from cracking or crumbling. If a piece does break, you can easily “weld” it back together with a bit of royal icing and let it dry before using it in the assembly. Always make sure your royal icing is thick enough, if it feels too runny, simply beat in another tablespoon or two of powdered sugar until it holds its shape. Using a heavy mug or a small can to prop up the walls while they dry can also be a huge help if you are working alone.
Variations of Pop-Tart Gingerbread House
There are so many ways to customize this project. You can create a “Chocolate Timber Frame” house by using chocolate flavored pastries and decorating with pretzel sticks for the wooden beams. For a colorful “Sugar Shack” version, use strawberry or blueberry pastries and neon colored candies. You can even make a tiny village by using mini toaster pastries for smaller structures. If you want a more rustic look, use shredded wheat cereal for the roof shingles to give it a thatched cottage appearance.
Serving Suggestions: What to Pair with Pop-Tart Gingerbread House
While this house makes a beautiful centerpiece, it is also completely edible. Serve it alongside a big pot of hot cocoa topped with marshmallows and a sprinkle of cinnamon. It also pairs perfectly with a platter of fresh fruit or a selection of classic Christmas cookies like shortbread or sugar cookies. If you are hosting a holiday party, you can set out small bowls of extra candy and icing so guests can add their own finishing touches to the display.
Storage & Reheating Instructions
The Pop-Tart Gingerbread House is best kept in a cool, dry area away from direct sunlight or humidity, which can soften the pastries and melt the icing. It can stay on display for up to two weeks, although the pastries will eventually become stale. If you intend to eat it, it is best consumed within 3 to 5 days. There is no need for reheating, as this is a cold assembly project and the textures are best maintained at room temperature. Avoid keeping it in the refrigerator, as the moisture will ruin the structure.
Memories Made Around the Table
I remember one specific Christmas when my traditional gingerbread house collapsed three times in a row, leaving me and my kids in a puddle of frustration. Switching to this method changed everything for us. We spent more time laughing and deciding where the gumdrops should go than we did trying to make the walls stand up. It has become a tradition that we look forward to every year, and it reminds me that the holidays are about the joy of creating together rather than achieving perfection in the kitchen.
FAQs
Can I use different brands of toaster pastries?
Yes, any brand of toaster pastry will work perfectly for this project. The most important factor is the shape and the fact that they are pre baked, which provides the stability needed for the house walls. Just be aware that some brands might be slightly thinner or thicker, so adjust your icing amount accordingly.
How do I prevent the roof from sliding off?
The key is to wait until the walls are quite firm before adding the roof. Additionally, you should use a very thick royal icing. You can also hold the roof pieces in place for several minutes or use small objects like juice boxes to prop them up while the icing sets initially.
Is the icing safe to eat?
This recipe uses meringue powder, which is a safe, shelf stable alternative to raw egg whites. It is perfectly fine to eat once it has dried. If you prefer not to use meringue powder, you can make a simple glaze of powdered sugar and water, but keep in mind it will be much less structural.
What if my pastry pieces crack while cutting?
Do not worry if a piece cracks. Simply pipe a line of royal icing along the crack and press the pieces back together. Once the icing dries, the “scar” will be very strong, and you can easily hide it with candy decorations or more icing later in the process.
How long does it take for the icing to dry completely?
While the icing will start to set within 10 to 15 minutes, it takes about 2 to 4 hours to dry completely hard. For the best results, I recommend letting the house sit overnight before moving it or doing any heavy decorating on the roof panels.
Final Thoughts
The Pop-Tart Gingerbread House is a wonderful example of how a simple shortcut can lead to more holiday magic. It removes the barrier of difficult baking and allows everyone, regardless of skill level, to enjoy the creative process of building a festive home. Whether you are looking for a quick afternoon activity with the kids or a unique centerpiece for your Christmas table, this recipe is sure to bring smiles and sweet memories to your home this season.

Pop-Tart Gingerbread House
- Total Time: 30 minutes
Ingredients
- 6 Frosted Brown Sugar Cinnamon Pop-Tarts (or your favorite flavor)
- 2 cups powdered sugar
- 2 tablespoons meringue powder
- 3 tablespoons warm water
- 1/2 teaspoon alcohol-free vanilla extract
- 1/2 cup small gumdrops
- 1/4 cup peppermint rounds
- 12 miniature candy canes
- 1 tablespoon festive sprinkles
- Edible glitter for a snowy effect
Instructions
- Lay out four of your toaster pastries on a clean workspace. Use a sharp serrated knife to gently saw two of the pastries into a house shape by cutting off the top corners to create a pointed gable. Keep the other two pastries whole for the side walls. Use two additional pastries for the roof panels, which can be left as full rectangles or trimmed slightly if you prefer a shorter roofline.
- In a medium bowl, whisk together the powdered sugar and meringue powder. Add the warm water and alcohol-free vanilla extract. Use an electric mixer to beat the mixture on high speed for about 5 to 7 minutes until it forms stiff, glossy peaks. This icing acts as the glue for your house, so it needs to be thick enough to hold the weight of the pastries and candy.
- Transfer the royal icing into a piping bag or a plastic storage bag with the corner snipped off. Pipe a thick line of icing onto a sturdy base, such as a cardboard cake board or a large flat plate. Stand the back gable piece and one side wall piece on the icing lines, then pipe a vertical line of icing where the two pieces meet. Hold them in place for a minute until the icing begins to set, then repeat with the front gable and the other side wall.
- Once the four walls are standing and the icing has hardened for about 10 minutes, pipe a generous amount of icing along the top edges of the wall structure. Carefully place the two remaining whole pastries onto the top to form the roof. Hold the roof pieces in place for a couple of minutes to ensure they do not slide down. It helps to pipe a line of icing along the very top ridge where the two roof pieces meet for extra stability.
- Use the remaining royal icing to “glue” gumdrops along the roofline and peppermint rounds around the base of the house. You can create a walkway using sprinkles or small candies. Use the miniature candy canes to frame the front door or create a decorative fence around the yard. Don’t forget to pipe some icicles hanging from the roof for a wintery touch.
- Allow the entire structure to dry completely in a cool, dry place for at least two hours before moving it. This ensures that all the candy is secure and the “glue” has fully hardened. Once set, you can dust the entire scene with edible glitter or a light sifting of powdered sugar to mimic a fresh snowfall.
- Cook Time: 30 minutes