
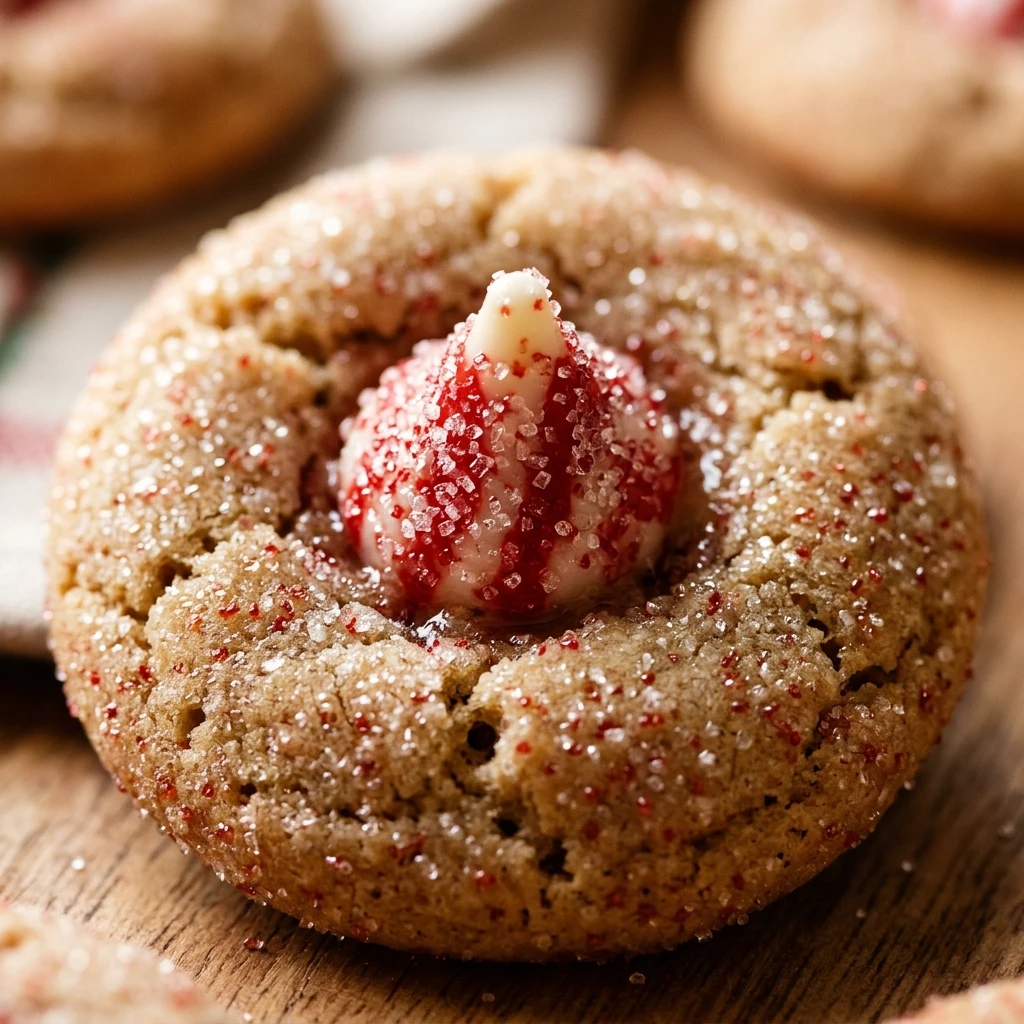
I always feel like the holiday season officially begins the moment I pull my first batch of Peppermint Kiss Cookies out of the oven. These festive treats are a staple on my Christmas cookie trays because they look just as beautiful as they taste. I love how the cool peppermint flavor pairs with the sweet chocolate center to create the perfect winter bite, making them a favorite for kids and adults alike.
Recipe Details
Recipe Information
- Prep Time: 15 minutes
- Cook Time: 10 minutes
- Total Time: 25 minutes
- Servings: 24 cookies
- Difficulty: Easy
Nutrition Information (Per Serving)
- Calories: 135 kcal
- Protein: 2g
- Carbs: 19g
- Fat: 6g
Why You’ll Love This Peppermint Kiss Cookies
These Peppermint Kiss Cookies are the ultimate Christmas treat because they combine a soft, buttery cookie base with the iconic crunch of holiday sprinkles. The addition of peppermint extract gives them a refreshing lift that feels so appropriate for a cold winter day. They are incredibly easy to assemble, which makes them a great project for little helpers in the kitchen. Plus, the bright red and white stripes of the chocolate kiss on top make them look professionally decorated without requiring any fancy piping skills.
Peppermint Kiss Cookies Ingredients & Substitutions
- 1/2 cup unsalted butter, softened
- 1/2 cup granulated white sugar
- 1/2 cup light brown sugar, packed
- 1 large egg
- 1 teaspoon alcohol-free vanilla extract
- 1/2 teaspoon peppermint extract
- 2 cups all-purpose flour
- 1 teaspoon baking soda
- 1/4 teaspoon salt
- 1/2 cup red and green holiday sprinkles
- 24 peppermint striped chocolate kisses, unwrapped
If you cannot find the peppermint striped kisses, plain milk chocolate or dark chocolate kisses work just as well for the center. You can substitute the all-purpose flour with a gluten-free flour blend if needed, and if you want a more intense color, feel free to add a drop of red gel food coloring to the dough. For those who want a crunchier texture, you can roll the dough balls in coarse sanding sugar instead of sprinkles before baking.
Step-by-Step Instructions to Make Peppermint Kiss Cookies
Step 1: Preparation
Start by preheating your oven to 350 degrees Fahrenheit. Line two large baking sheets with parchment paper or silicone baking mats so the cookies do not stick. Take this time to unwrap all of your peppermint chocolate kisses and place them in a small bowl so they are ready to go as soon as the cookies come out of the oven.
Step 2: Cream the Butter and Sugars
In a large mixing bowl, beat the softened butter, granulated sugar, and brown sugar together until the mixture is light and fluffy. You can use a hand mixer or a stand mixer for this part, which usually takes about two to three minutes of mixing on medium speed.
Step 3: Add Wet Ingredients
Add the egg, alcohol-free vanilla extract, and peppermint extract to the butter mixture. Continue to beat the ingredients until they are fully combined, scraping down the sides of the bowl with a spatula to ensure everything is incorporated evenly.
Step 4: Incorporate Dry Ingredients
In a separate medium bowl, whisk together the all-purpose flour, baking soda, and salt. Gradually add these dry ingredients to the wet batter while mixing on low speed. Mix only until the flour streaks disappear to avoid overworking the dough, which can make the cookies tough.
Step 5: Roll and Coat
Scoop about one tablespoon of dough at a time and roll it between your palms to form a smooth ball. Roll each ball into the bowl of holiday sprinkles until it is thoroughly coated. Place the dough balls on the prepared baking sheets, spacing them about two inches apart.
Step 6: Bake
Place the baking sheets in the oven and bake for 8 to 10 minutes. You want the edges to be set, but the centers should still look slightly soft. Do not overbake, as the cookies will continue to firm up as they cool on the hot pan.
Step 7: The Final Touch
Immediately after removing the cookies from the oven, press one peppermint chocolate kiss firmly into the center of each cookie. The heat from the cookie will slightly melt the bottom of the chocolate, helping it stick. Let the cookies cool on the baking sheet for five minutes before moving them to a wire rack to cool completely.
Tips for Success
To ensure your Peppermint Kiss Cookies turn out perfectly, make sure your butter is truly at room temperature before you start. If the butter is too cold, the dough will be crumbly, and if it is melted, the cookies will spread too much in the oven. When pressing the chocolate kiss into the cookie, do it gently to avoid cracking the edges of the cookie too deeply. If you find the chocolate is melting too much and losing its shape, you can pop the entire baking sheet into the refrigerator for ten minutes right after adding the kisses.
Variations of Peppermint Kiss Cookies
There are so many ways to customize this recipe for your Christmas celebrations. You could try a chocolate version by replacing 1/4 cup of the flour with cocoa powder for a “hot cocoa” inspired treat. Another fun variation is to use different types of chocolate kisses, such as those filled with caramel or white chocolate, to offer a variety of flavors on one plate. For a more sophisticated look, skip the sprinkles and roll the dough in crushed candy canes instead for an extra burst of peppermint flavor and a festive crunch.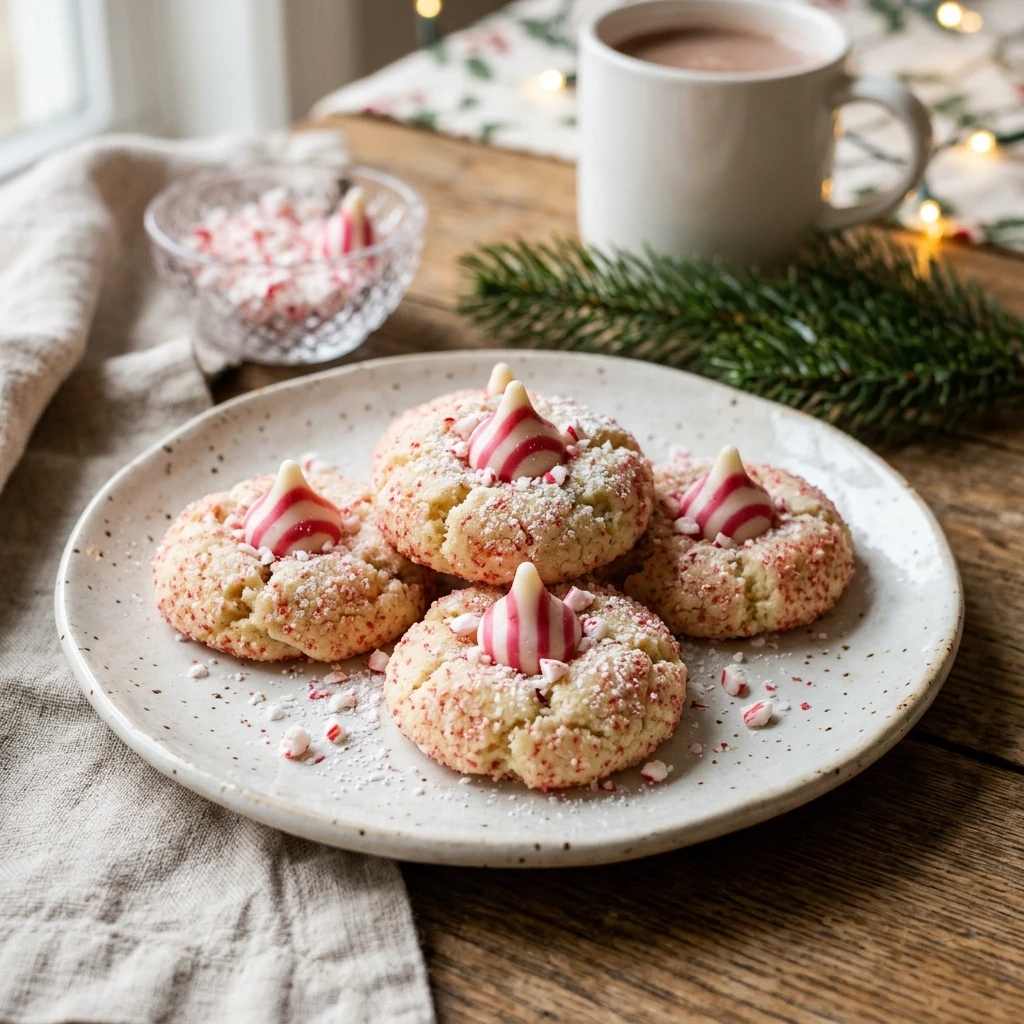
Serving Suggestions: What to Pair with Peppermint Kiss Cookies
These cookies are wonderful when served alongside a steaming mug of hot chocolate topped with whipped cream. For a festive holiday party, arrange them on a large wooden platter with other seasonal favorites like gingerbread men and shortbread. They also pair beautifully with a cold glass of milk or a spicy herbal tea. If you are gifting these, place them in a decorative tin lined with red tissue paper to make a beautiful homemade Christmas present for neighbors or teachers.
Storage & Reheating Instructions
Store your Peppermint Kiss Cookies in an airtight container at room temperature for up to five days. To keep them soft, you can place a small slice of white bread in the container, which helps maintain moisture. If you want to store them longer, these cookies freeze well for up to three months. To freeze, place them in a single layer on a tray until frozen solid, then transfer to a freezer-safe bag. Let them thaw at room temperature for about an hour before serving. Reheating is not recommended as it will melt the chocolate kiss on top.
Memories Made Around the Table
I remember spending Saturday afternoons in December with my grandmother, flour dusted over every surface of her tiny kitchen. She was the one who taught me that the secret to the best Christmas cookies was a heavy hand with the sprinkles and a lot of patience while the chocolate set. We would sit by the window, watching the snow fall, and wait for the cookies to be cool enough to eat. Now, every time I smell the scent of peppermint and warm sugar, I am transported back to those moments of pure holiday magic.
FAQs
How do I keep the chocolate kisses from melting and collapsing?
The trick is to let the cookies cool for just one or two minutes after they come out of the oven before pressing the kiss in. If you put them on immediately, the chocolate can lose its shape. If your kitchen is very warm, placing the cookies in the fridge for a few minutes after assembly will help the chocolate set quickly.
Can I make the cookie dough in advance?
Yes, you can prepare the dough and keep it in the refrigerator for up to 48 hours. When you are ready to bake, let the dough sit at room temperature for about 20 minutes so it is soft enough to roll into balls and coat in sprinkles.
Why did my cookies turn out flat?
Cookies usually spread too much if the butter was too soft or melted when you started mixing. Another reason could be that the baking sheet was still hot from a previous batch. Always make sure to use a cool baking sheet for every new set of dough balls.
Can I use different extracts if I do not like peppermint?
Absolutely. If peppermint is not your favorite, you can use two teaspoons of alcohol-free vanilla extract instead, or try almond or orange extract for a different flavor profile that still feels very festive.
Do I have to use sprinkles?
You do not have to use sprinkles, but they do add a nice texture and festive look. You can leave the cookies plain, roll them in granulated sugar, or even roll them in crushed nuts if you prefer a different finish.
Final Thoughts
Peppermint Kiss Cookies are more than just a dessert, they are a festive tradition that brings joy to the kitchen. With their bright colors and classic flavor combination, they are sure to become a highlight of your holiday baking. Whether you are making them for a cookie swap or just to enjoy by the fireplace, these treats capture the essence of Christmas in every bite. Happy baking and enjoy the sweet taste of the season!

Peppermint Kiss Cookies
- Total Time: 25 minutes
Ingredients
- 1/2 cup unsalted butter, softened
- 1/2 cup granulated white sugar
- 1/2 cup light brown sugar, packed
- 1 large egg
- 1 teaspoon alcohol-free vanilla extract
- 1/2 teaspoon peppermint extract
- 2 cups all-purpose flour
- 1 teaspoon baking soda
- 1/4 teaspoon salt
- 1/2 cup red and green holiday sprinkles
- 24 peppermint striped chocolate kisses, unwrapped
Instructions
- Start by preheating your oven to 350 degrees Fahrenheit. Line two large baking sheets with parchment paper or silicone baking mats so the cookies do not stick. Take this time to unwrap all of your peppermint chocolate kisses and place them in a small bowl so they are ready to go as soon as the cookies come out of the oven.
- In a large mixing bowl, beat the softened butter, granulated sugar, and brown sugar together until the mixture is light and fluffy. You can use a hand mixer or a stand mixer for this part, which usually takes about two to three minutes of mixing on medium speed.
- Add the egg, alcohol-free vanilla extract, and peppermint extract to the butter mixture. Continue to beat the ingredients until they are fully combined, scraping down the sides of the bowl with a spatula to ensure everything is incorporated evenly.
- In a separate medium bowl, whisk together the all-purpose flour, baking soda, and salt. Gradually add these dry ingredients to the wet batter while mixing on low speed. Mix only until the flour streaks disappear to avoid overworking the dough, which can make the cookies tough.
- Scoop about one tablespoon of dough at a time and roll it between your palms to form a smooth ball. Roll each ball into the bowl of holiday sprinkles until it is thoroughly coated. Place the dough balls on the prepared baking sheets, spacing them about two inches apart.
- Place the baking sheets in the oven and bake for 8 to 10 minutes. You want the edges to be set, but the centers should still look slightly soft. Do not overbake, as the cookies will continue to firm up as they cool on the hot pan.
- Immediately after removing the cookies from the oven, press one peppermint chocolate kiss firmly into the center of each cookie. The heat from the cookie will slightly melt the bottom of the chocolate, helping it stick. Let the cookies cool on the baking sheet for five minutes before moving them to a wire rack to cool completely.
- Cook Time: 25 minutes
- Diet: Vegetarian