
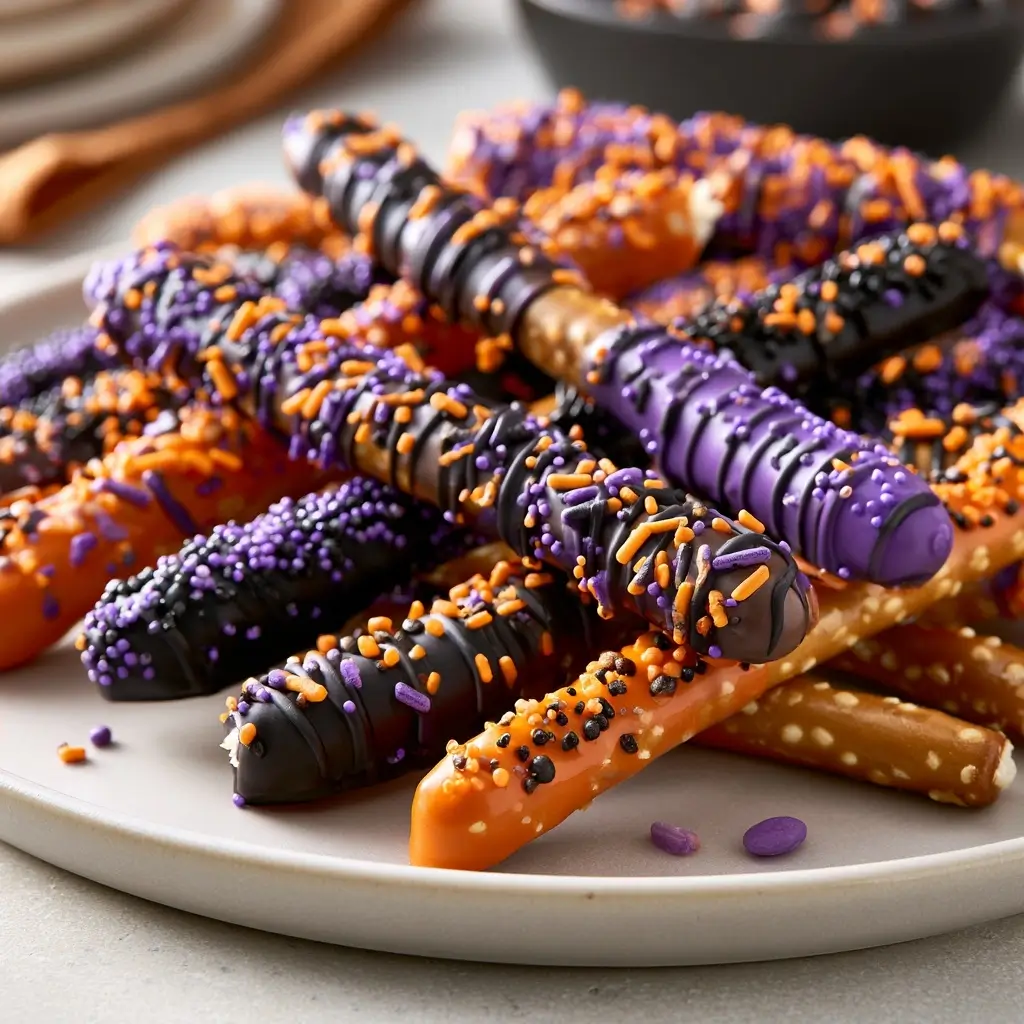
These Customizable Halloween Pretzels are the kind of easy treat that makes snack time feel festive without much effort. They are crisp, sweet, salty, and fun to decorate, so you can change the colors and toppings for any Halloween gathering.
Halloween Pretzels
Equipment
- 1 Baking Sheet
- 1 Parchment Paper or silicone mat
- 1 Microwave-safe Bowl
Ingredients
- 8 oz pretzel twists or rods
- 1 cup white chocolate or candy melts
- 0.5 tsp alcohol-free vanilla optional
- 0.25 cup sprinkles, candy eyes, colored sanding sugar, or crushed cookies for decorating
- 1 tsp coconut oil or neutral oil as needed to thin the coating
Instructions
- Line a baking sheet with parchment paper or a silicone mat so the pretzels can set without sticking.
- Place the white chocolate or candy melts in a microwave-safe bowl and heat in short intervals, stirring often until smooth. If the mixture feels too thick, add a tiny bit of coconut oil or neutral oil.
- Dip each pretzel halfway or fully, depending on the look you want. Let the excess coating drip off before placing it on the lined tray.
- While the coating is still wet, sprinkle on decorations, press on candy eyes, or drizzle with a second color for a more playful design.
- Allow the pretzels to rest at room temperature until firm, or place the tray in the fridge for a faster finish.
Notes
Why You’ll Love This Halloween Pretzels
There is so much to love about these little pretzels. They come together quickly, use simple ingredients, and can be dressed up in all kinds of spooky colors and patterns. They are also a great make-ahead option for parties, classroom treats, or an at-home movie night.
Halloween Pretzels Ingredients & Substitutions
- Pretzel twists or rods, choose your favorite shape for dipping and decorating.
- White chocolate or candy melts, use orange, purple, green, or black colors for a festive look.
- Alcohol-free vanilla, optional, for a little extra flavor in the white coating.
- Sprinkles, candy eyes, colored sanding sugar, or crushed cookies, for decorating.
- Coconut oil or a small amount of neutral oil, if needed, to thin the coating.
If you want to switch things up, use dark chocolate, milk chocolate, or a mix of candy melts. You can also add crushed pretzels, mini marshmallows, or seasonal sprinkles on top while the coating is still soft.
Step-by-Step Instructions to Make Halloween Pretzels
Step 1: Prepare the baking tray
Line a baking sheet with parchment paper or a silicone mat so the pretzels can set without sticking.
Step 2: Melt the coating
Place the white chocolate or candy melts in a microwave-safe bowl and heat in short intervals, stirring often until smooth. If the mixture feels too thick, add a tiny bit of coconut oil or neutral oil.
Step 3: Dip the pretzels
Dip each pretzel halfway or fully, depending on the look you want. Let the excess coating drip off before placing it on the lined tray.
Step 4: Add the decorations
While the coating is still wet, sprinkle on decorations, press on candy eyes, or drizzle with a second color for a more playful design.
Step 5: Let them set
Allow the pretzels to rest at room temperature until firm, or place the tray in the fridge for a faster finish.
Tips for Success
Work in small batches so the coating stays smooth and easy to decorate. If you are using candy melts, melt them slowly to avoid overheating. Keep your toppings nearby before you start, because the pretzels set fairly quickly once dipped. For the cleanest look, tap the pretzel gently after dipping to remove extra coating.
Variations of Halloween Pretzels
Try orange coating with black sprinkles for a classic Halloween color scheme. Use green candy melts and candy eyes for a monster-inspired version. For a spooky-sweet mix, drizzle dark chocolate over white-coated pretzels and finish with crushed cookies. You can also make pretzel rods instead of twists for a bigger, more dramatic treat.
Serving Suggestions: What to Pair with Halloween Pretzels
Serve these pretzels with popcorn, fresh fruit, apple slices, or a simple hot cocoa bar. They also make a nice addition to a dessert board with cookies, candies, and seasonal treats. For parties, pack them in small clear bags tied with ribbon for an easy grab-and-go favor.
Storage & Reheating Instructions
Store the cooled pretzels in an airtight container at room temperature for up to 1 week. Keep them in a cool, dry place so the coating stays crisp. If your kitchen is warm, store them in the fridge, then let them come back to room temperature before serving. No reheating is needed.
Memories Made Around the Table
There is something especially fun about making a treat like this with kids or friends. Everyone can choose their colors, add their own decorations, and make a batch that feels personal. That is often the part people remember most, not just how they taste, but how much fun they were to make together.
FAQs
Can I make these ahead of time?
Yes, these pretzels are a great make-ahead treat. Once fully set, store them in an airtight container until you are ready to serve.
What is the best chocolate to use?
Candy melts are the easiest option because they melt smoothly and set well. White chocolate also works, but you may need a little oil to keep it fluid.
How do I keep the decorations from sliding off?
Add sprinkles, candy eyes, and other toppings right after dipping the pretzels, before the coating starts to firm up.
Can I use pretzel sticks instead of twists?
Absolutely. Pretzel rods or sticks are perfect if you want a longer shape that is easy to dip and drizzle.
Final Thoughts
These Customizable Halloween Pretzels are simple, festive, and easy to make your own. Whether you keep them classic or go bold with colors and toppings, they are a sweet little project that brings extra fun to the season.