
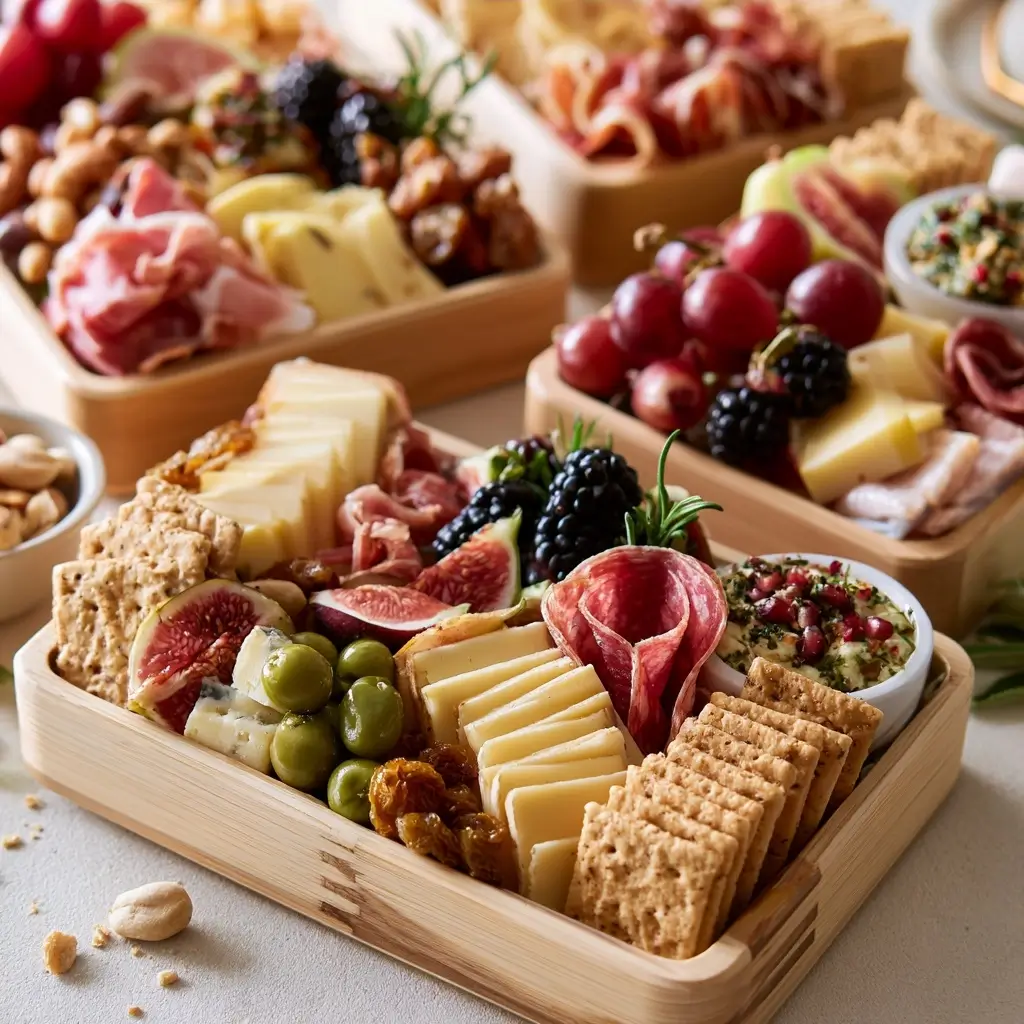
Mini charcuterie boards for individual servings make entertaining feel easy, polished, and personal. They are perfect when you want a pretty spread without setting out one large board for everyone to share.
Mini Charcuterie Boards
Equipment
- 4 Small boards, plates, trays, or slate pieces
Ingredients
Cheese
- Assorted cheese such as cheddar, gouda, brie, Swiss, or manchego
Crackers
- Assorted crackers such as water crackers, multigrain crackers, or crostini
Fresh fruit
- Assorted fresh fruit such as grapes, strawberries, apple slices, figs, or berries
Meat
- Assorted meat such as salami, turkey slices, roast beef, or turkey bacon crisps
Sweet bites
- Honey jam, dark chocolate, or dried fruit
Crunchy extras
- Almonds walnuts, pistachios, or pretzels
Pickled items
- Cornichons pickled onions, or olives
Fresh garnish
- Rosemary thyme, basil, or mint
Instructions
- Start with small boards, plates, trays, or even sturdy slate pieces. A flat surface gives each serving a neat, finished look.
- Arrange the cheese portions and any small bowls for honey, jam, or olives first. These items help anchor the board and make the layout feel balanced.
- Fold or roll the meat slices for height and tuck the crackers near the cheese. Keeping these items grouped makes each board easy to pick up and enjoy.
- Add grapes, berries, nuts, or pretzels to open spaces. This is where the board starts to look full and colorful without feeling crowded.
- Place a small herb sprig or two on each board for a fresh, styled touch. Serve right away, or chill briefly if you are making them ahead.
Notes
Why You’ll Love This Mini Charcuterie Boards
This is the kind of recipe that looks impressive but comes together quickly. Each board can be customized, so everyone gets a mix of savory, sweet, creamy, and crunchy bites.
They are also great for parties, date nights, picnics, or even a cozy movie evening at home. Best of all, you can build them with simple store-bought ingredients and a few fresh extras.
Mini Charcuterie Boards Ingredients & Substitutions
Here is a flexible mix of ingredients you can use for mini charcuterie boards for individual servings:
- Cheese: cheddar, gouda, brie, Swiss, or manchego
- Crackers: water crackers, multigrain crackers, or crostini
- Fresh fruit: grapes, strawberries, apple slices, figs, or berries
- Meat: salami, turkey slices, roast beef, or turkey bacon crisps
- Sweet bites: honey, jam, dark chocolate, or dried fruit
- Crunchy extras: almonds, walnuts, pistachios, or pretzels
- Pickled items: cornichons, pickled onions, or olives
- Fresh garnish: rosemary, thyme, basil, or mint
If you want a meat-free board, add extra cheese, nuts, hummus, roasted vegetables, or marinated artichokes. For a softer flavor profile, use mild cheeses and fresh fruit, then add one bold item like olives or mustard for contrast.
Step-by-Step Instructions to Make Mini Charcuterie Boards
1. Choose your serving base
Start with small boards, plates, trays, or even sturdy slate pieces. A flat surface gives each serving a neat, finished look.
2. Place the larger items first
Arrange the cheese portions and any small bowls for honey, jam, or olives first. These items help anchor the board and make the layout feel balanced.
3. Add the meats and crackers
Fold or roll the meat slices for height and tuck the crackers near the cheese. Keeping these items grouped makes each board easy to pick up and enjoy.
4. Fill in with fruit and crunchy snacks
Add grapes, berries, nuts, or pretzels to open spaces. This is where the board starts to look full and colorful without feeling crowded.
5. Finish with garnish
Place a small herb sprig or two on each board for a fresh, styled touch. Serve right away, or chill briefly if you are making them ahead.
Tips for Success
Keep the portions small and intentional. Individual boards should feel abundant, but not overloaded.
Use a mix of colors and textures so each board looks inviting. Creamy cheese, crisp crackers, juicy fruit, and crunchy nuts create the best bite.
If making these for a group, prep all ingredients before assembling. That way, you can build each board quickly and keep the food fresh.
Variations of Mini Charcuterie Boards
Try a breakfast version with soft cheese, berries, nuts, and mini waffles or croissants. For lunch, add sliced turkey, cheese, olives, cucumbers, and crackers.
For a more elegant party board, include brie, grapes, figs, almonds, and a little honey. You can also make a kid-friendly version with mild cheese, apple slices, crackers, and fruit leather.
Serving Suggestions: What to Pair with Mini Charcuterie Boards
These boards pair well with sparkling water, iced tea, lemonade, or fresh juice. For a larger spread, serve them alongside soup, salad, or a simple pasta dish.
They also work beautifully with festive appetizers like stuffed mushrooms, deviled eggs, or roasted nuts. If you are hosting a gathering, set them out just before guests arrive for the freshest presentation.
Storage & Reheating Instructions
Mini charcuterie boards are best served fresh, but you can prep most ingredients a few hours ahead. Store cheese, fruit, and meats separately in airtight containers in the refrigerator until assembly time.
If a board has already been assembled, cover it tightly and refrigerate for up to 1 day. These boards do not need reheating, but let the cheese sit at room temperature for a short time before serving for the best flavor and texture.
Memories Made Around the Table
Some of my favorite gatherings have started with a simple board and a few thoughtful ingredients. There is something lovely about giving each person their own little spread, it feels welcoming, special, and just a bit more personal.
FAQs
Can I make mini charcuterie boards ahead of time?
Yes, you can prep the ingredients ahead and assemble them a few hours before serving. For the best texture, add crackers and delicate fruit as close to serving time as possible.
What is the best cheese for mini charcuterie boards?
A mix of soft and firm cheeses works well. Good choices include brie, cheddar, gouda, Swiss, and manchego.
How do I keep the boards from looking empty?
Use a variety of small items to fill gaps, such as fruit, nuts, herbs, and crackers. Layering ingredients and varying shapes helps the board look full and inviting.
Can I make these without meat?
Absolutely. Add extra cheese, fruit, nuts, olives, hummus, or roasted vegetables to build a satisfying meat-free board.
Final Thoughts
Mini charcuterie boards for individual servings are such an easy way to make any meal or gathering feel special. With a little planning and a mix of colors and textures, you can create something beautiful that everyone will enjoy.