
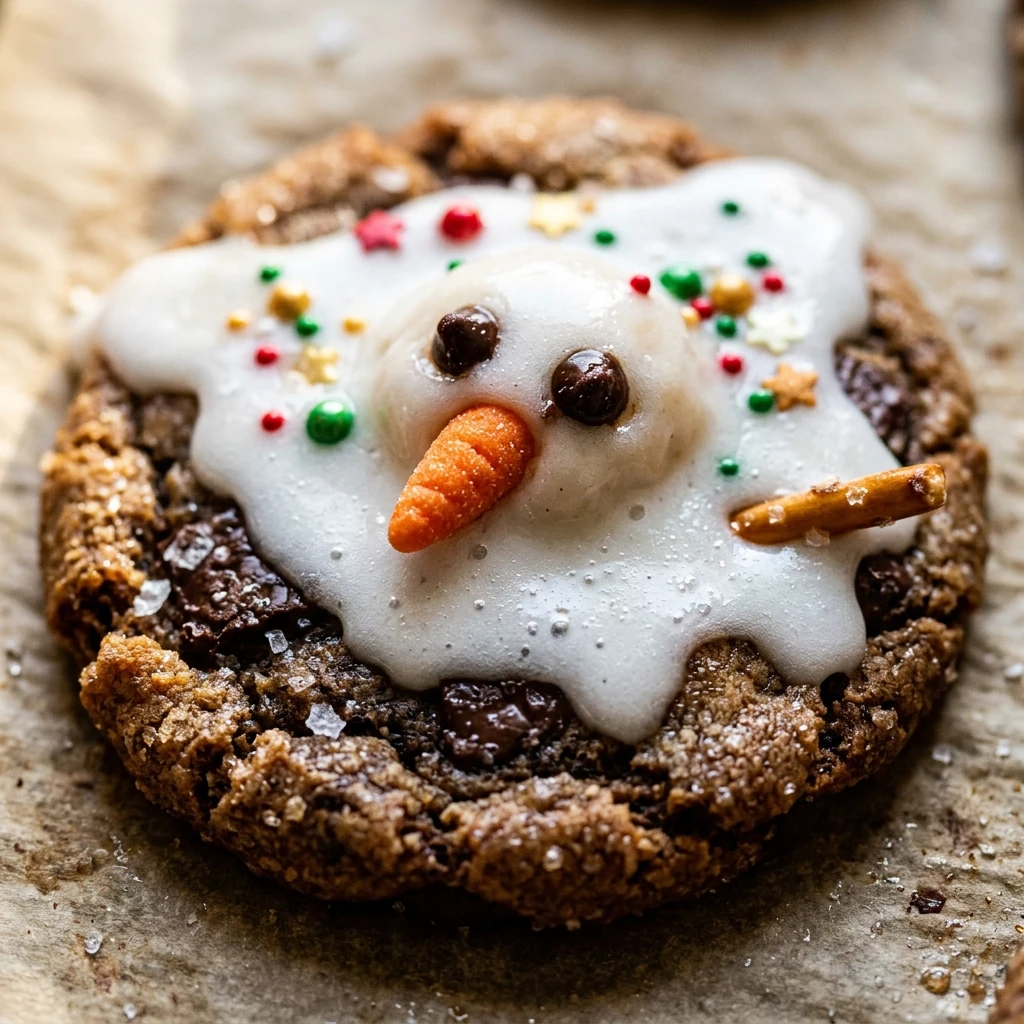
Christmas is my favorite time for baking because it allows me to share something truly whimsical and sweet with my friends and family. I love making these Melted Snowman Cookies every year because they look so charming on a platter and always bring a smile to everyone’s face, regardless of their age. They are the perfect activity for a cozy afternoon when you want to stay warm inside while the snow falls outside.
Recipe Details
Recipe Information
- Prep Time: 30 minutes
- Cook Time: 10 minutes
- Total Time: 40 minutes
- Servings: 24 cookies
- Difficulty: Easy
Nutrition Information (Per Serving)
- Calories: 185 kcal
- Protein: 2g
- Carbs: 28g
- Fat: 8g
Why You’ll Love This Melted Snowman Cookies
These cookies are a festive favorite because they combine a classic sugar cookie base with a playful, creative design. Since they are supposed to look like they are melting, there is no pressure to make the frosting look perfect. This makes them incredibly fun to decorate with children or during a holiday party. The combination of soft cookie, fluffy marshmallow, and sweet icing creates a wonderful texture that captures the spirit of Christmas in every bite.
Melted Snowman Cookies Ingredients & Substitutions
- 2.5 cups all purpose flour
- 1 cup unsalted butter, softened
- 1 cup granulated sugar
- 1 large egg
- 1 teaspoon alcohol-free vanilla
- 0.5 teaspoon baking powder
- 0.25 teaspoon salt
- 1 container white vanilla frosting
- 24 large marshmallows
- Black decorating gel or icing
- Orange decorating icing or small carrot sprinkles
You can easily substitute the homemade cookie dough with a refrigerated store bought sugar cookie roll to save time during the busy holiday rush. If you want a different flavor profile, try using a gingerbread or chocolate cookie base instead of the traditional sugar cookie. For the icing, a simple glaze made from powdered sugar and a splash of milk can be used if you do not have canned white frosting available in your pantry.
Step-by-Step Instructions to Make Melted Snowman Cookies
Step 1: Preparation
Preheat your oven to 350 degrees Fahrenheit and line two large baking sheets with parchment paper. This prevents the cookies from sticking and ensures even browning on the bottom of each treat.
Step 2: Mix the Dough
In a large bowl, cream together the softened butter and granulated sugar until the mixture is light and fluffy. Add the egg and the alcohol-free vanilla, beating until well combined. Gradually stir in the flour, baking powder, and salt until a soft dough forms.
Step 3: Bake the Cookies
Roll the dough into one inch balls and place them two inches apart on the prepared baking sheets. Flatten them slightly with the palm of your hand. Bake for 8 to 10 minutes, or until the edges are just barely golden. Allow the cookies to cool completely on a wire rack before you begin the decorating process.
Step 4: Create the Melted Snow Effect
Spoon a generous dollop of white frosting onto the center of each cooled cookie. Use the back of the spoon to spread the icing toward the edges in an irregular, wavy pattern to mimic the look of a melting puddle of snow.
Step 5: Add the Snowman Head
Place one large marshmallow toward the back edge of the frosted cookie while the icing is still wet. This represents the head of your snowman. Press down gently to make sure it stays in place as the icing sets.
Step 6: Decorate the Details
Use the black decorating gel to draw two dots for eyes and a dotted smile on the marshmallow head. Add two black dots on the frosted cookie for buttons and two thin lines for stick arms. Finally, use the orange icing to draw a small triangle for the carrot nose on the marshmallow.
Tips for Success
To get the best results, make sure your cookies are completely cool before you apply the frosting. If the cookies are still warm, the icing will become too thin and run right off the edges instead of staying in a nice puddle. If your marshmallows are not sticking well, you can put a small dot of frosting on the bottom of the marshmallow to act as a glue. For the most realistic melting look, do not worry about making the icing circles even. The more irregular they are, the more they look like real snow melting in the sun.
Variations of Melted Snowman Cookies
You can get creative by adding different accessories to your snowmen. Try using small peanut butter cups or chocolate wafers as hats for your snowmen. If you want a colorful touch, use fruit leather or thin strips of sour candy to wrap around the snowman’s neck like a scarf. You can also sprinkle a little bit of clear edible glitter or sanding sugar over the wet white icing to give the melted snow a shimmering, icy effect.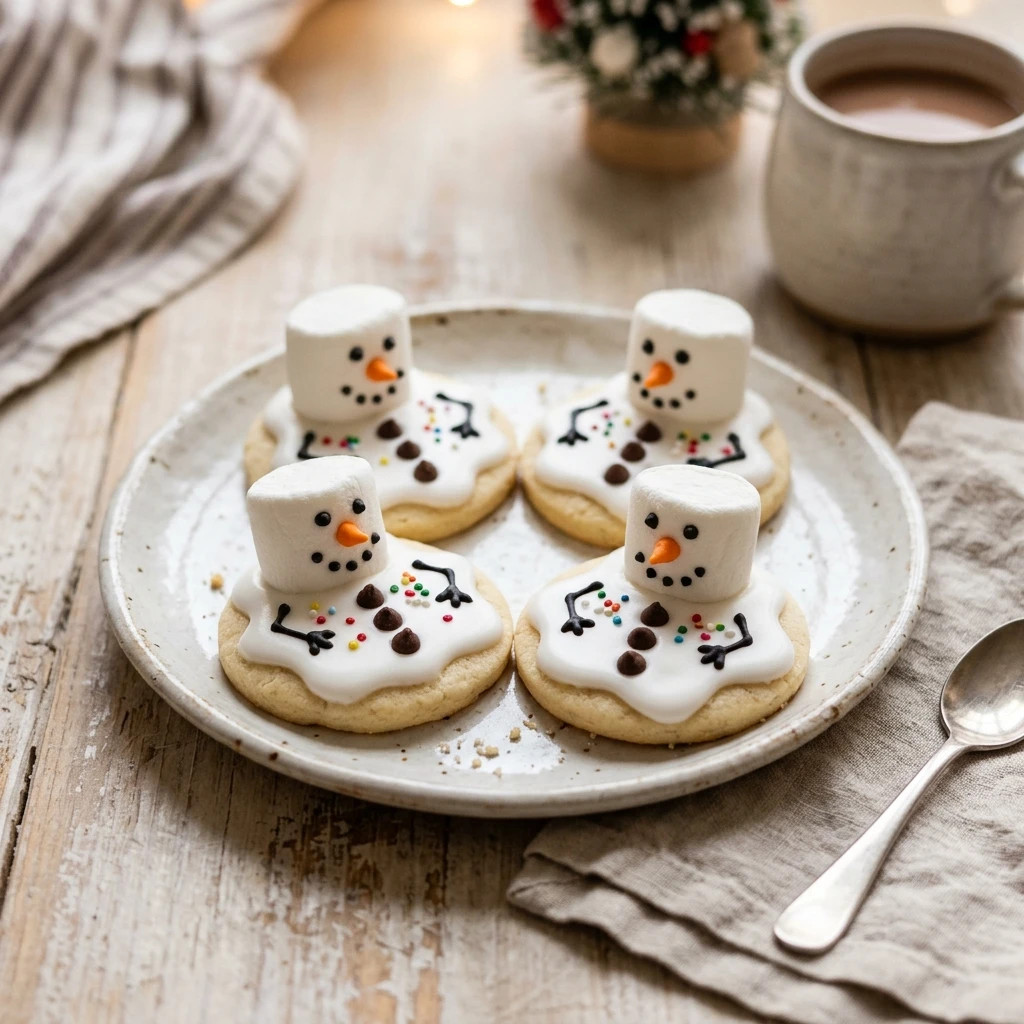
Serving Suggestions: What to Pair with Melted Snowman Cookies
These cookies are the perfect companion for a steaming mug of hot cocoa topped with extra marshmallows. If you are serving them at a Christmas party, they look beautiful alongside other holiday classics like peppermint bark and gingerbread men. For a balanced dessert tray, pair them with some fresh red berries or apple slices to contrast the sweetness of the icing and the soft cookie base.
Storage & Reheating Instructions
Store these cookies in a single layer in an airtight container at room temperature for up to three days. If you need to stack them, place a piece of parchment paper between the layers, but be careful not to crush the marshmallow heads or smudge the decorating gel. These cookies do not require reheating, as they are best enjoyed at room temperature to keep the frosting and marshmallows intact. If you wish to freeze them, it is best to freeze the plain baked cookies and decorate them fresh after they have thawed.
Memories Made Around the Table
I remember the first time I made these with my nieces on a very cold December afternoon. We spent hours laughing at our “clumsy” snowmen and deciding which one looked the most like he was actually sliding off the cookie. It has since become a staple in our home, and every year we find new ways to make the snowmen look even more silly. These cookies are not just about the taste, but about the joy of creating something together during the most wonderful time of the year.
FAQs
Can I make these cookies ahead of time?
Yes, you can bake the sugar cookies up to two days in advance and keep them in an airtight container. However, I recommend decorating them on the day you plan to serve them so the icing remains fresh and the marshmallows do not become stale or hard.
What if I cannot find black decorating gel?
If black decorating gel is unavailable, you can melt a small amount of dark chocolate chips and use a toothpick to dot the eyes, mouth, and buttons onto the snowmen. This works just as well and adds a nice chocolate flavor to the treat.
How do I keep the icing from being too runny?
If you are making your own glaze and it seems too thin, simply whisk in more powdered sugar one tablespoon at a time until it reaches a thick, spreadable consistency. It should be thick enough to hold its shape on the cookie without immediately dripping off the sides.
Can I use mini marshmallows instead?
While large marshmallows give the best scale for a standard cookie, you can certainly use mini marshmallows if you are making bite sized thumbprint cookies. They will look like tiny, adorable melting snowmen on a smaller scale.
Do I need to refrigerate these cookies?
No, there is no need to refrigerate these cookies once they are decorated. Keeping them at room temperature is actually better for the texture of the marshmallow and the sugar cookie base. Just ensure they are kept in a cool, dry place away from direct heat.
Final Thoughts
Melted Snowman Cookies are a delightful way to bring the magic of a white Christmas into your kitchen. They are easy to make, incredibly fun to decorate, and even better to eat. Whether you are looking for a new family tradition or a standout dessert for your holiday gift baskets, these cookies are sure to be a hit. Happy baking and Merry Christmas!
Melted Snowman Cookies
- Total Time: 40 minutes
Ingredients
- 2.5 cups all purpose flour
- 1 cup unsalted butter, softened
- 1 cup granulated sugar
- 1 large egg
- 1 teaspoon alcohol-free vanilla
- 0.5 teaspoon baking powder
- 0.25 teaspoon salt
- 1 container white vanilla frosting
- 24 large marshmallows
- Black decorating gel or icing
- Orange decorating icing or small carrot sprinkles
Instructions
- Preheat your oven to 350 degrees Fahrenheit and line two large baking sheets with parchment paper. This prevents the cookies from sticking and ensures even browning on the bottom of each treat.
- In a large bowl, cream together the softened butter and granulated sugar until the mixture is light and fluffy. Add the egg and the alcohol-free vanilla, beating until well combined. Gradually stir in the flour, baking powder, and salt until a soft dough forms.
- Roll the dough into one inch balls and place them two inches apart on the prepared baking sheets. Flatten them slightly with the palm of your hand. Bake for 8 to 10 minutes, or until the edges are just barely golden. Allow the cookies to cool completely on a wire rack before you begin the decorating process.
- Spoon a generous dollop of white frosting onto the center of each cooled cookie. Use the back of the spoon to spread the icing toward the edges in an irregular, wavy pattern to mimic the look of a melting puddle of snow.
- Place one large marshmallow toward the back edge of the frosted cookie while the icing is still wet. This represents the head of your snowman. Press down gently to make sure it stays in place as the icing sets.
- Use the black decorating gel to draw two dots for eyes and a dotted smile on the marshmallow head. Add two black dots on the frosted cookie for buttons and two thin lines for stick arms. Finally, use the orange icing to draw a small triangle for the carrot nose on the marshmallow.
- Cook Time: 40 minutes
- Diet: Not Specified