

Every Christmas Eve, I find myself craving something cool and creamy to balance out all the heavy holiday roasts and warm sides. This Chocolate Peppermint Lasagna has become my favorite festive tradition because it looks like a winter masterpiece but requires zero time in the oven. I love how the layers of dark chocolate and bright peppermint remind me of the snowy nights we spend decorating the tree with my family.
Recipe Details
Recipe Information
- Prep Time: 30 minutes
- Cook Time: 0 minutes
- Total Time: 4 hours 30 minutes
- Servings: 12 servings
- Difficulty: Easy
Nutrition Information (Per Serving)
- Calories: 385 kcal
- Protein: 4 g
- Carbs: 48 g
- Fat: 21 g
Why You’ll Love This Chocolate Peppermint Lasagna
This dessert is the ultimate crowd-pleaser for your Christmas party because it combines the classic duo of chocolate and mint in a light, airy format. Since it is a no-bake recipe, you do not have to worry about fighting for oven space while the turkey or ham is roasting. The striking red and white layers look beautiful on a holiday dessert table, and the refreshing peppermint flavor provides a perfect palate cleanser after a big meal.
Chocolate Peppermint Lasagna Ingredients & Substitutions
- 36 chocolate sandwich cookies (with cream filling)
- 6 tablespoons unsalted butter, melted
- 8 ounces cream cheese, softened to room temperature
- 1/4 cup granulated sugar
- 2 tablespoons cold milk
- 12 ounces whipped topping, divided
- 1/2 teaspoon peppermint extract
- 1/4 teaspoon alcohol-free vanilla
- 2 packages (3.9 ounces each) instant chocolate pudding mix
- 3 1/4 cups cold whole milk
- 1/2 cup crushed candy canes or peppermint candies
- 1/4 cup mini chocolate chips
If you cannot find peppermint-filled cookies, plain chocolate sandwich cookies work just as well for the crust. You can substitute the whipped topping with homemade whipped cream by beating heavy cream with a little sugar until stiff peaks form. For a deeper flavor, try using dark chocolate pudding instead of milk chocolate, and feel free to use gluten-free sandwich cookies if you are catering to specific guest needs. Ensure the cream cheese is fully softened to avoid any lumps in your peppermint layer.
Step-by-Step Instructions to Make Chocolate Peppermint Lasagna
Step 1: Prepare the Cookie Crust
Place the chocolate sandwich cookies in a food processor and pulse until they become fine crumbs. Transfer the crumbs to a medium bowl and stir in the melted butter until the mixture looks like wet sand. Press this mixture firmly into the bottom of a 9 by 13 inch baking dish to form an even layer. Place the dish in the freezer for about 10 minutes to set while you prepare the next layer.
Step 2: Create the Peppermint Cream Layer
In a large mixing bowl, beat the softened cream cheese with a hand mixer until it is smooth and creamy. Add the 2 tablespoons of milk and granulated sugar, then continue beating until well combined. Gently fold in 1 and 1/2 cups of the whipped topping, the peppermint extract, and the alcohol-free vanilla. Spread this minty white mixture carefully over the chilled cookie crust using a spatula.
Step 3: Whisk the Chocolate Pudding Layer
In another large bowl, combine both packages of instant chocolate pudding mix with the 3 1/4 cups of cold whole milk. Whisk the mixture vigorously for about two minutes until it starts to thicken. Let it sit for another three minutes to reach a spreadable consistency. Pour the chocolate pudding over the peppermint cream layer and spread it out to the edges of the dish.
Step 4: Add the Final Topping
Spread the remaining whipped topping over the chocolate pudding layer as the final “snowy” coating. Use the back of a spoon to create pretty swirls in the topping for a professional look. At this stage, do not add the candy canes yet, as they may bleed color into the white cream if they sit too long in the fridge.
Step 5: Chill and Garnish
Cover the dish with plastic wrap and refrigerate for at least 4 hours, though overnight is even better for the flavors to meld. Just before serving, sprinkle the crushed candy canes and mini chocolate chips over the top. This ensures the peppermint pieces stay crunchy and vibrant for your guests.
Tips for Success
To get clean, beautiful slices, make sure the lasagna is thoroughly chilled before you try to cut it. Dipping your knife in warm water and wiping it dry between each cut will help you move through the layers without smearing the colors. If you are crushing your own candy canes, place them in a heavy-duty freezer bag and use a rolling pin to smash them. This prevents a sticky mess on your counters. Always use instant pudding rather than the cook-and-serve variety, as the latter will not set properly for this no-bake structure.
Variations of Chocolate Peppermint Lasagna
For an extra chocolatey punch, you can drizzle chocolate syrup over the top layer just before serving. If you want a more colorful look, you can add a few drops of red or green food coloring to the cream cheese layer to make the peppermint flavor pop visually. Another delicious variation involves adding a layer of crushed brownies between the pudding and the whipped topping for extra texture. If you prefer a milder mint flavor, you can swap the peppermint extract for extra alcohol-free vanilla and rely solely on the crushed candy canes for the minty notes.
Serving Suggestions: What to Pair with Chocolate Peppermint Lasagna
This dessert pairs wonderfully with a hot cup of cocoa or a steaming mug of coffee after a Christmas dinner. Since it is very rich, serving it with a side of fresh berries, like raspberries or strawberries, can add a nice tartness to balance the sweetness. It also looks beautiful served on festive holiday plates alongside some ginger snap cookies or shortbread. If you want a truly indulgent experience, serve a small scoop of alcohol-free vanilla bean ice cream on the side.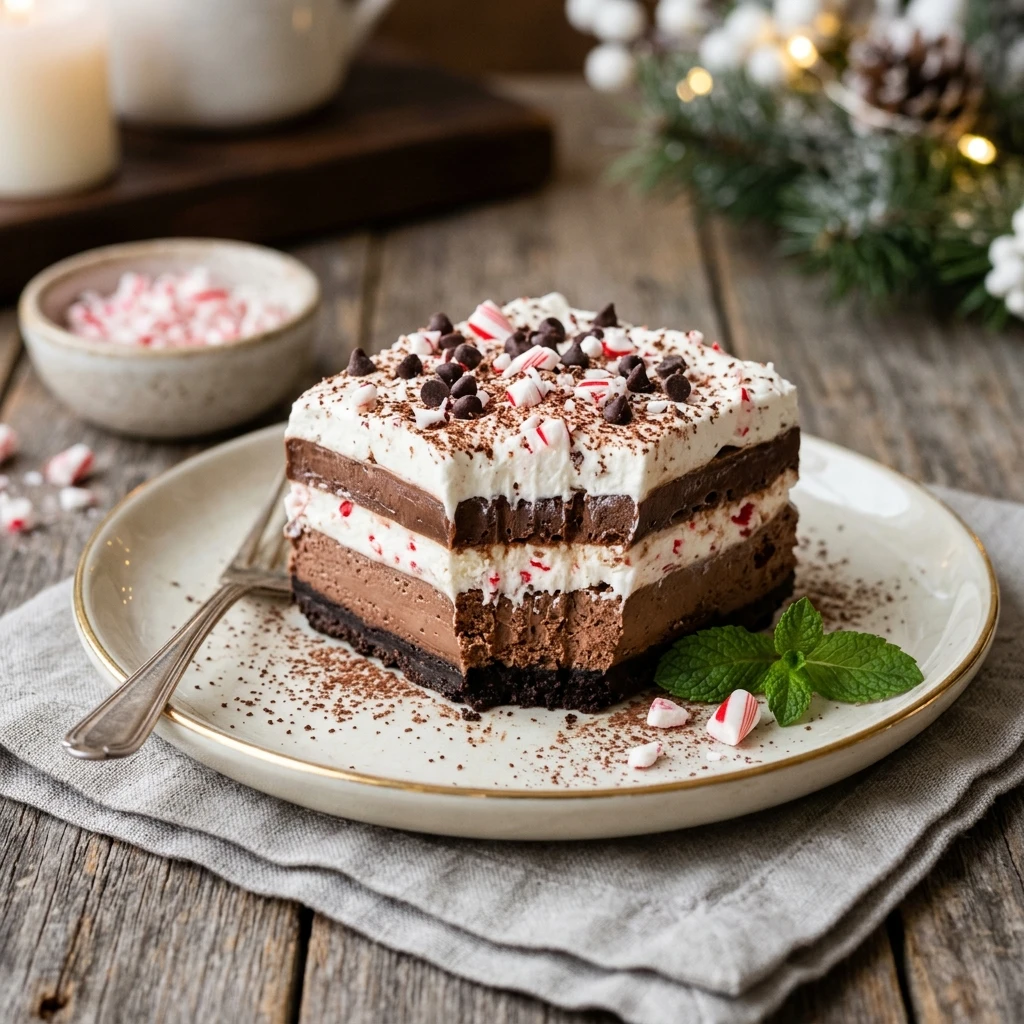
Storage & Reheating Instructions
Since this is a chilled dessert, it should never be reheated. Keep the lasagna covered in the refrigerator whenever it is not being served. It will stay fresh and delicious for up to 3 to 4 days. If you find the candy canes are starting to melt or become sticky after a day or two, you can simply scrape them off and add a fresh sprinkle of crushed mints before serving leftovers. You can also freeze this dessert for up to a month. Just thaw it in the refrigerator for a few hours before you plan to eat it.
Memories Made Around the Table
One of my favorite memories involves my young nieces helping me crush the candy canes for this recipe. We ended up with peppermint dust everywhere, but their excitement when they saw the finished red and white layers was worth every bit of cleaning. Now, whenever I bring this dish to our Christmas gathering, everyone gathers around the kitchen island waiting for that first slice. It has become a symbol of the joy and simplicity that the holiday season is all about.
FAQs
Can I make this dessert in advance?
Yes, this is an excellent make ahead dessert. In fact, it actually tastes better when it has had at least 8 to 12 hours to set in the refrigerator. Just remember to wait until the very last minute to add the crushed candy canes so they do not lose their crunch or bleed color.
What is the best way to crush the candy canes?
The easiest method is to place unwrapped candy canes into a zip-top bag and use a rolling pin or a heavy skillet to crush them. You can control the texture this way, leaving some larger chunks for crunch and some fine powder for flavor.
Do I need to bake the crust?
No baking is required for this recipe. The melted butter acts as a binder, and as it chills in the freezer and then the refrigerator, it will firm up enough to hold the weight of the layers. This makes it a perfect recipe for busy holiday schedules.
Can I use homemade whipped cream instead of whipped topping?
You can certainly use homemade whipped cream. However, keep in mind that whipped topping is more stable and holds its shape longer. If you use homemade cream, make sure to whip it to very stiff peaks so the lasagna does not become too soft or runny.
How long does this stay fresh in the fridge?
This dessert will stay fresh for about 3 to 4 days if kept covered in the refrigerator. The crust may soften slightly as time goes on, but the flavors actually deepen. It is best enjoyed within the first 48 hours for the best texture.
Final Thoughts
Chocolate Peppermint Lasagna is the perfect way to bring a little bit of holiday magic to your table without the stress of baking. Its cool, creamy layers and festive decorations make it an instant hit for Christmas celebrations of all sizes. Whether you are making it for a large family gathering or a small cozy night in, this treat is sure to become a new favorite in your holiday recipe book.


Chocolate Peppermint Lasagna
- Total Time: 4 hours 30 minutes
Ingredients
- 36 chocolate sandwich cookies (with cream filling)
- 6 tablespoons unsalted butter, melted
- 8 ounces cream cheese, softened to room temperature
- 1/4 cup granulated sugar
- 2 tablespoons cold milk
- 12 ounces whipped topping, divided
- 1/2 teaspoon peppermint extract
- 1/4 teaspoon alcohol-free vanilla
- 2 packages (3.9 ounces each) instant chocolate pudding mix
- 3 1/4 cups cold whole milk
- 1/2 cup crushed candy canes or peppermint candies
- 1/4 cup mini chocolate chips
Instructions
- Step 1: Prepare the Cookie Crust
Place the chocolate sandwich cookies in a food processor and pulse until they become fine crumbs. Transfer the crumbs to a medium bowl and stir in the melted butter until the mixture looks like wet sand. Press this mixture firmly into the bottom of a 9 by 13 inch baking dish to form an even layer. Place the dish in the freezer for about 10 minutes to set while you prepare the next layer. - Step 2: Create the Peppermint Cream Layer
In a large mixing bowl, beat the softened cream cheese with a hand mixer until it is smooth and creamy. Add the 2 tablespoons of milk and granulated sugar, then continue beating until well combined. Gently fold in 1 and 1/2 cups of the whipped topping, the peppermint extract, and the alcohol-free vanilla. Spread this minty white mixture carefully over the chilled cookie crust using a spatula. - Step 3: Whisk the Chocolate Pudding Layer
In another large bowl, combine both packages of instant chocolate pudding mix with the 3 1/4 cups of cold whole milk. Whisk the mixture vigorously for about two minutes until it starts to thicken. Let it sit for another three minutes to reach a spreadable consistency. Pour the chocolate pudding over the peppermint cream layer and spread it out to the edges of the dish. - Step 4: Add the Final Topping
Spread the remaining whipped topping over the chocolate pudding layer as the final “snowy” coating. Use the back of a spoon to create pretty swirls in the topping for a professional look. At this stage, do not add the candy canes yet, as they may bleed color into the white cream if they sit too long in the fridge. - Step 5: Chill and Garnish
Cover the dish with plastic wrap and refrigerate for at least 4 hours, though overnight is even better for the flavors to meld. Just before serving, sprinkle the crushed candy canes and mini chocolate chips over the top. This ensures the peppermint pieces stay crunchy and vibrant for your guests.
- Cook Time: 4 hours 30 minutes
- Diet: Vegetarian, Gluten-Free Option