
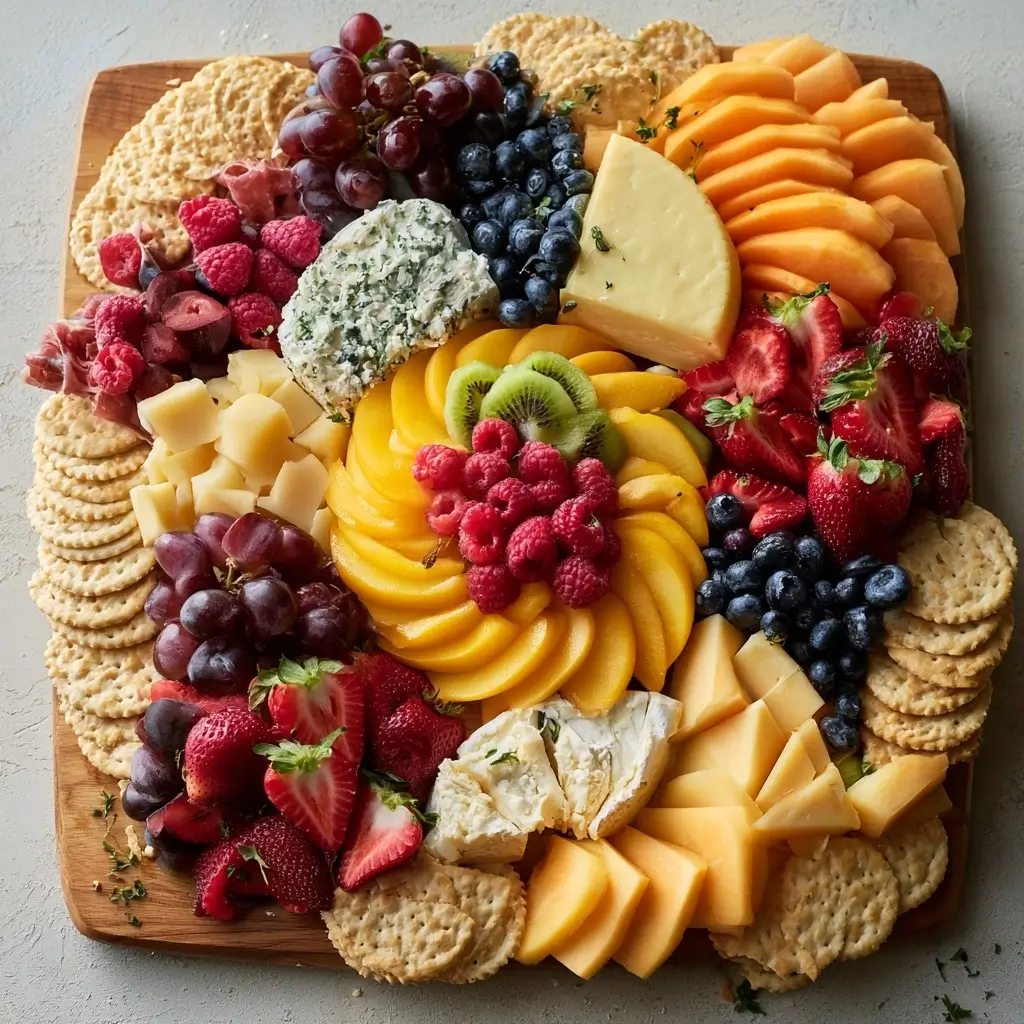
Cheese fruit platters are one of those effortless ideas that still feels special on the table. With creamy cheese, juicy fruit, and a few simple extras, you can build a platter that looks beautiful and tastes fresh in every bite.
Cheese Fruit Platters
Equipment
- 1 Large platter or board
- 1 Knife
- 1 Cutting Board
Instructions
- Wash and dry all the fruit well. Slice larger fruit into bite-sized pieces, and cut the cheese into cubes, wedges, or thin slices so it is easy to serve.
- Select a large board, tray, or serving platter. A flat surface gives you room to arrange everything in layers and lets the colors stand out nicely.
- Arrange the cheese across the platter in a few small groups. Spacing it out helps create balance and gives you places to tuck the fruit around it.
- Fill in the open spaces with fruit of different colors and shapes. Try to place larger fruit pieces first, then nestle smaller berries and grapes into the gaps.
- Scatter crackers, breadsticks, or nuts around the edges or in open sections. Finish with fresh herbs for a polished look and, if you like, a small dish of honey or jam.
- Set the platter out just before serving so the fruit stays fresh and the cheese keeps its best texture. If needed, cover and chill briefly until guests are ready.
Notes
Why You’ll Love This Cheese Fruit Platters
This is the kind of platter that works for breakfast, brunch, parties, or a light dessert spread. It is colorful, easy to assemble, and flexible enough to use whatever fruit is in season. You can keep it simple or make it feel a little more elegant with a few garnish touches.
Cheese Fruit Platters Ingredients & Substitutions
- Assorted cheeses, such as cheddar, gouda, brie, mozzarella, or cream cheese
- Fresh fruit, such as strawberries, grapes, blueberries, melon, pineapple, kiwi, apple slices, and orange segments
- Crunchy extras, such as crackers, breadsticks, pretzels, or toasted bread
- Fresh herbs, like mint or basil, for a pretty finish
- Honey or fruit jam, for serving if desired
- Nuts, such as almonds, walnuts, or pistachios, if you want more crunch
If you do not have a soft cheese, use sliced block cheese instead. If one fruit is not in season, swap it for another that looks fresh and tastes sweet. For a little more brightness, add a small bowl of yogurt dip or a citrus fruit salad on the side.
Step-by-Step Instructions to Make Cheese Fruit Platters
Step 1: Prepare the Ingredients
Wash and dry all the fruit well. Slice larger fruit into bite-sized pieces, and cut the cheese into cubes, wedges, or thin slices so it is easy to serve.
Step 2: Choose Your Platter
Select a large board, tray, or serving platter. A flat surface gives you room to arrange everything in layers and lets the colors stand out nicely.
Step 3: Place the Cheese First
Arrange the cheese across the platter in a few small groups. Spacing it out helps create balance and gives you places to tuck the fruit around it.
Step 4: Add the Fruit
Fill in the open spaces with fruit of different colors and shapes. Try to place larger fruit pieces first, then nestle smaller berries and grapes into the gaps.
Step 5: Add Crunch and Garnish
Scatter crackers, breadsticks, or nuts around the edges or in open sections. Finish with fresh herbs for a polished look and, if you like, a small dish of honey or jam.
Step 6: Serve Right Away
Set the platter out just before serving so the fruit stays fresh and the cheese keeps its best texture. If needed, cover and chill briefly until guests are ready.
Tips for Success
Use a mix of colors so the platter feels lively and inviting. Dry the fruit thoroughly after washing, because extra moisture can make the platter look messy. If you are serving this outdoors or for a longer gathering, choose firmer cheeses and fruit that hold up well, like grapes, apples, and melon.
Variations of Cheese Fruit Platters
For a sweeter version, include strawberries, figs, and a drizzle of honey. For a more savory board, lean into sharper cheese, green grapes, and apple slices. You can also make a kid-friendly platter with mild cheese cubes, berries, crackers, and a few fun shapes cut from melon or cheese.
Serving Suggestions: What to Pair with Cheese Fruit Platters
Serve these platters with tea, coffee, sparkling water, or fresh juice for a simple brunch spread. They also pair nicely with muffins, croissants, savory pastries, or a light soup if you are building a larger meal.
Storage & Reheating Instructions
Cheese fruit platters are best assembled shortly before serving. If you have leftovers, store the cheese, fruit, and crackers separately in airtight containers in the refrigerator. The fruit is best eaten within 1 to 2 days, and the cheese should be brought back to cool room temperature before serving again. No reheating is needed.
Memories Made Around the Table
Some of my favorite gatherings have started with a simple platter like this on the table. People naturally gather around it, reach for what looks good, and start talking before the meal even begins. That is the quiet magic of food that feels easy and welcoming.
FAQs
What cheeses work best for cheese fruit platters?
A mix of soft and firm cheeses works best. Try cheddar, brie, gouda, mozzarella, or cream cheese for a nice variety of texture and flavor.
What fruit should I use on a cheese platter?
Use fruit that is fresh, colorful, and easy to eat. Grapes, berries, melon, apple slices, kiwi, and orange segments are all great choices.
How do I keep fruit from browning?
Apple and pear slices can be tossed lightly with lemon juice to slow browning. Keep the platter chilled until serving time for the best look and taste.
Can I make cheese fruit platters ahead of time?
Yes, you can prep the fruit and cheese a few hours ahead. For the freshest presentation, assemble the platter close to serving time.
Final Thoughts
Cheese fruit platters are proof that simple food can still feel thoughtful and beautiful. With a few fresh ingredients and a little arranging, you can create a platter that suits breakfast, brunch, or any casual get-together.